Thursday, July 8, 2010

The Best Dish Scrubbers You Can Make

UPDATE: I called mine the best, but it's the nylon yarn that makes these scrubbers the best for scrubbing.  I just found another pattern, at Rostitchery, for a nice compact round scrubber.  I am off to make one of these now; it might be better than mine. 

If you don't think that dish scrubbers make a good gift idea, I encourage you to look next to your friends and family members' sinks.  I have been so surprised to see that people who wash their hands, brush their teeth, and vacuum their floors often have a nasty, yucky, gross, old sponge on their sink ledge for washing dishes.  This is disgusting, people!  I care about my friends and family and I want to save them from the billions of germs that live in such sponges, so I think a pair of these makes an excellent gift.  These dish scrubbers can go in the washing machine and dryer, so with one to use and one to wash, your loved ones can always have something fresh and clean for scrubbing dishes.

This was the first design I came up with for the Knifty Knitter long looms.  All you need to make one of these handy dandy little scrubbers is the pink short loom, 2 skeins of nylon yarn, and an hour.


You can make these with one skein of nylon yarn and one ball of cotton, but cotton tends to stay damp longer.  Using nylon yarn gives these scrubbers their scrubbing ability and it dries out fast.

Wrap your loom as directed, using both strands of yarn.  Knit the piece until it has reached 5 inches, and then loom off, leaving tails approximately 7" long.


Then, take the short ends and bring them together.  Use one of your yarn tails to sew these edges together, behind the first row, creating a ridge, which will be your handle.  Then, center the handle in the middle, on the top layer of the scrubber.  Then use your other yarn tails to sew this top layer down to the bottom layer, keeping the handle ridge centered, and closing the open edges.

 
And here is what one looks like when you are done.  These are the best things I have found for scrubbing dishes; they are strong and scrub well.  The handle is handy and being able to wash these makes them sanitary and clean.  A pair of these makes a nice gift, especially when coupled with handmade dish scrubbing soap.  There are various ways to make liquid soap, but the easiest is to start with liquid castile soap.  I use Dr. Bronner's lavender.  Squeeze this into a pretty bottle, add warm water, a little glycerine, and some lavender essential oil, and you're done.

This is my original design; do not make these for sale.  But have fun making these for yourself and as gifts.

UPDATE: Now, after I made and posted this, I have seen another scrubber, designed Rowena at Rostitchery, that looks even neater than mine, as it is round.  I think it is a good bit smaller, though, and haven't tried her way yet.  I am going to make one her way now, but I wanted to post this and apologize to Rowena for proclaiming my scrubber the "best!"  Here again, is the link to the neat round scrubber at Rostitchery.

Update:  I have had a lot of folks asking where to find the nylon yarn for making these.  I like using the "Bonnie" brand the best, and they do carry it at Amazon.  Here are some links
There are other colors available, too.

Wednesday, July 7, 2010

Gift Idea: Colored Pencil/ Crayon/ Marker Rolls

I am sorry I am late with this post.  Tuesday was a high intensity Mama day, as it rained, keeping my big boy inside, and my little guy wanted Mama to hold him all day.  I wasn't able to even go in the sewing room until nearly midnight. And then, once I started making these, I kept thinking of someone else who would like one.

There are a lot of colored pencil roll tutorials to choose from, and every one I have seen is super cute.  I started with one from Carson J. Designs, although I made a couple changes.  I didn't have a cord stop, so I used ribbon instead.  And I also added an inner layer.  I have seen some tutorials call for a layer of flannel or fusible fleece.  I used what I had, which was a piece of canvas curtain.  I also used the serger to finish the edges, instead of turning...this speeds things up a lot.   Here is a view of the inside of one I made tonight:


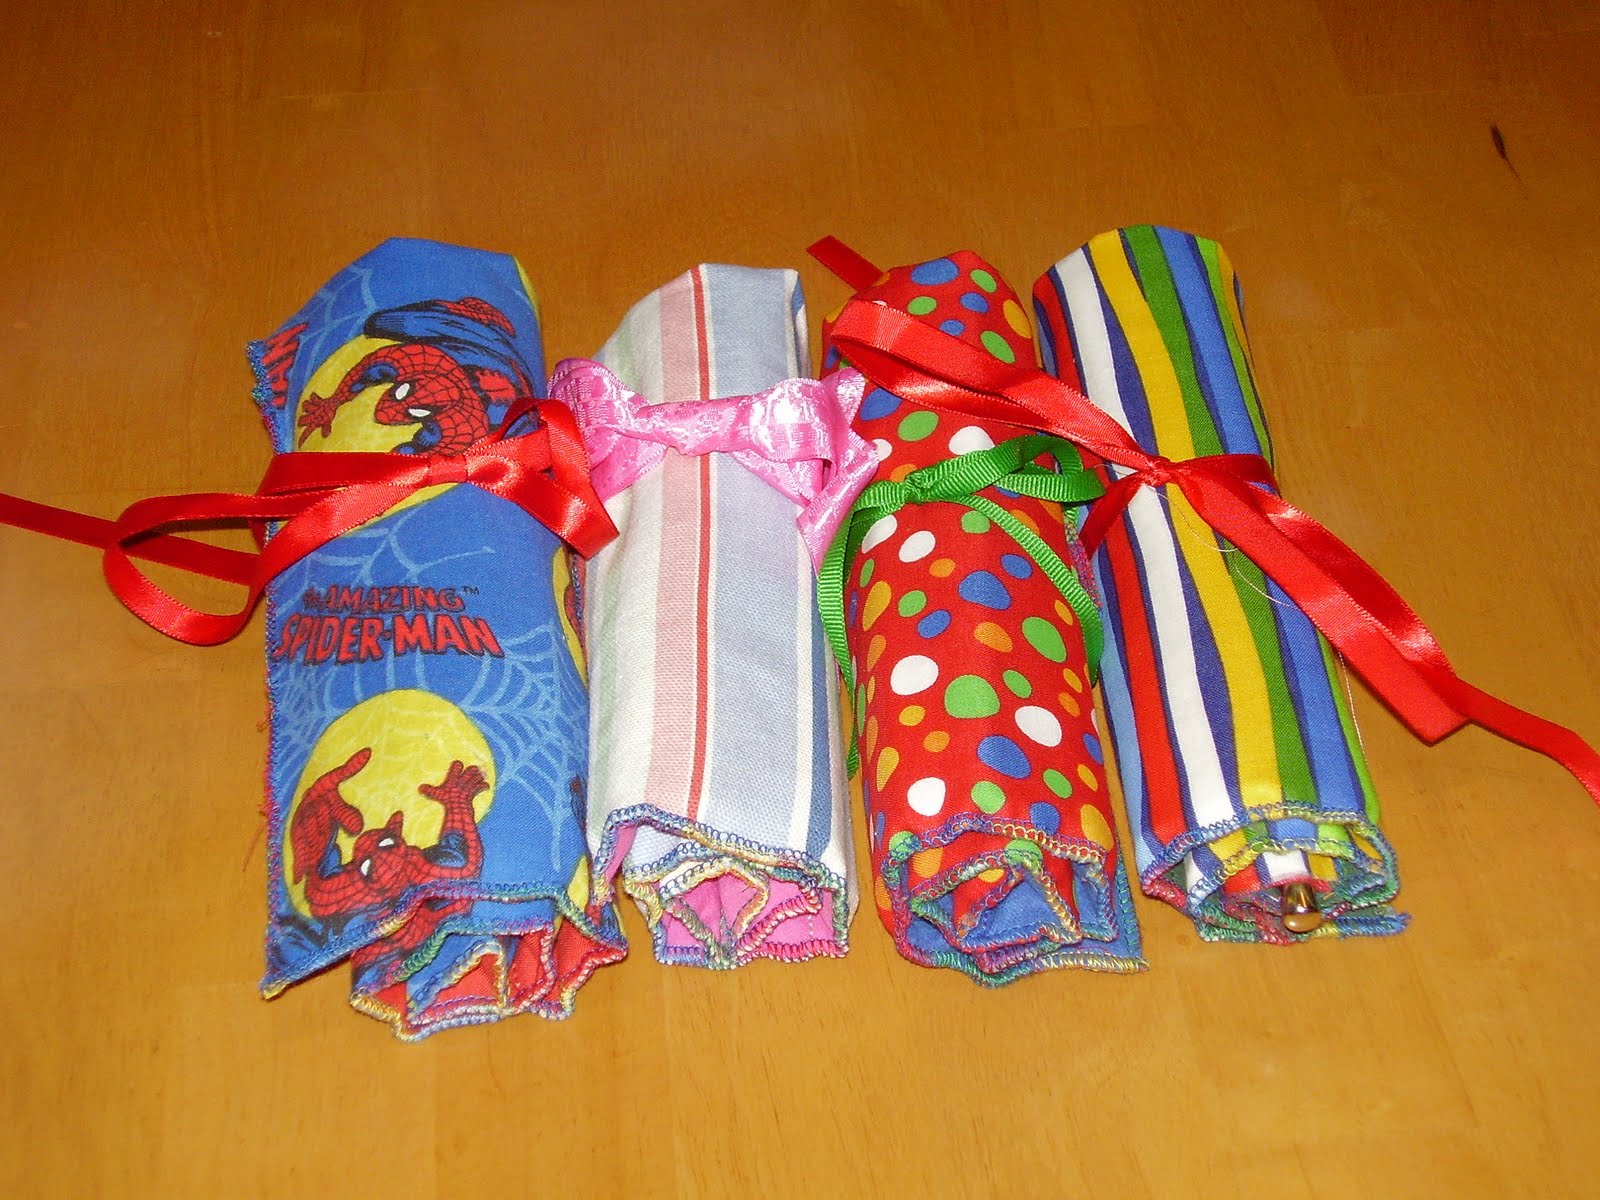
And then I made three more.  The Spider Man is for a particular neighbor boy who is always wearing either one of two pairs of Spider Man shoes, or one of what must be a dozen different Spider Man shirts:


There are other tutorials for beautiful colored pencil rolls at You Go Girl  and  Pink Chalk Studio, and possibly elsewhere, as well.

After I finished these, I decided to do crayon rolls.  I had seen pictures of precious rolls at Skip to My Lou, but the little boys I am making these for will need the fat kind of crayons.  So I just kindof adapted the rolls I had just made, cutting the rainbow strips at 2" x 9":


I thought these should definitely have a fold down flap, to prevent the crayons being spilled in Mama's purse.
Here they are all rolled up:


I got all six of these gifts made in just about two hours, so you can see that these are quick and easy projects.  I really like sewing the rainbow strips together; it's like making a little quilt.

It is 3 am now, so I must go to bed.  If it wasn't so late I would like to make Fawnda's marker roll; there is a tutorial at Fireflies and Jellybeans.  I would like to make one of these for my sharpies, as well as some for gifts.  But that will have to be another day!

If you haven't seen my giveaway yet, please read this post.   Next Monday my baby will draw a name from a hat to determine the winner of my patchwork needle book/ sewing kit.  You need to comment on that post, or be a follower of this blog, for your chance to win it.

I am going to bed!  I hope to see ya'll tomorrow.

Monday, July 5, 2010

Gift Idea: Car Rolls

 I had plenty fabric left from that firetruck crib sheet that I used to make the toy box, and I decided to use it (along with pieces from 2 other sheets and a salvaged jeans leg for the road section) and make a car cozy.  I have made one of these before, using the great tutorial at My Little Gems.


I kept thinking as I was turning this right sides out that the process could be speeded up with the serger.  So I made another one in less than half the time, using rainbow variegated thread to finish the edges.


My baby will be ready for hot wheels by December, so I think he will just love this.  We also have a lot of sweet little boys on our street, so I am about to go back in my sewing room and use the rest of these fabrics (there is still more left of that crib sheet), to make at least a couple more.  These would make a great birthday gift, too, especially if you had one or two already made and could just grab it and go to a party.  They are perfect for slipping into Mama's purse so she has a great diversion to offer her boy while out and about.

There is also another beautiful tutorial for another way of making these at Homemade By Jill.  I haven't made one this way yet, but I have a piece of natural duck cloth and some paints and can think of a lot of fun ways to do this one.  Maybe I will try her way next.

And here is another variation on this project, this time at The Trendy Treehouse.  I just now saw this, and like me, I am sure you, too will see many fun possibilities for decorating this one.  I think I am about to break out my paints!  I hope ya'll have a great day!

Did you see this post yet?  I am giving away a sewing kit/ needle book made by me on Monday; you need to comment (or be a follower of this blog) for your chance to win it.

Saturday, July 3, 2010

Happy Holidays Gifts: Sewing and Needle Book- You Can Win It!

 Happy Saturday, Ya'll.

I haven't finished with the tutorial for this yet.  I want to make it a pdf file (which I will share with my followers as a gift, and sell after that), but I have a little learning to do first.  I hope you all don't mind waiting; I apologize!

But I can show you the first sewing and needle book I made.  This is the gift I am giving away next week.  And as I said, am working on making the instructions into a pdf file, so that you can make one for yourself or someone you love, too.


This is the front cover.  This little book has a zippered pocket to hold folding scissors, a seam ripper, needle threader, and quilter's thimble.  This little book is my original design; do not make these for sale.  If anyone wants to buy one, they will be available in several different cover designs in my Etsy shop, opening soon.

Here is a look at the inside:


This book is not exactly perfect, as I wish I had not used that darker green thread to sew closed the zip pocket.  Like I said, this was the first one I made!  It works just fine and I think it is pretty.


This is the back cover.  This project started when I bent to the scrap bag just to grab a little piece to test that orange/gold thread, which I hadn't used before.  Something inside me told me to make something pretty while I tried out the thread.  I made the patchwork piece that became the front cover, and when I looked at it, the idea for this little book just popped in my head!

I will announce the winner for this either Sunday evening or at the latest on Monday, July 12, 2010.  Comment on this post for a chance to win it.  Or, as I have said, to reward my loyal readers, if you are a follower of this blog I will put your name in the hat twice.  Three times if you comment!  I will let my 1 year old choose a name from the hat as the winner.

Good luck!  Ya'll have a great day; I will be back real soon.....

Friday, July 2, 2010

Crib Sheet to Toy Box Recon

Ever since I first heard about the Iron Crafter Challenge and the secret ingredient of sheets, I have been thinking about this crib sheet:


This will be my second entry in this challenge.
I removed the elastic from the edges and cut the corners so I could press the crib sheet before taking this picture.  My baby loves trucks and is quickly amassing quite the collection.  He really needs a box for his "cars" and I think this will be just the project for this sheet.  I also have some other sheets.


At first I wasn't sure which to use for this project, but the red sheet has already been cut and I have some navy bias tape I could use for the top edges.

So, you need the crib sheet (or whatever) and another sheet or pillowcase (or whatever) to use for the lining, some bias tape, which you can easily make from your sheet if you don't have any, and sheets of needlepoint canvas.  I used these because I had them, and because I want my box to be sturdy enough to stand up well.

Start by cutting 5 squares measuring 5 3/4" each,  from the crib sheet.  You also need 5 squares (again, 5.75") for the lining, and 5 squares of cotton batting.  I cut my batting squares a little bit larger, just to be safe.


Take one lining square and one front square and line them up right sides together, and then lay down one of your batting squares on top.  Sew with a 1/4" seam allowance on three sides, leaving the entire 4th side open for turning.  Now, you could just trim the edges and press and turn.  But I like to use the serger and I want to show you what it can do.  So, after I sew my 1/4" seams, I run them quickly under the serger.    I want to show you a picture, but I had a hard time taking one while serging.  It's blurry, but I will show you and hope you can see.  Notice at the top what has already passed through the serger has been trimmed neatly with the edges wrapped in thread.  At the bottom of the picture, you can see all the excess batting that is being trimmed as it goes into the serger.


Like I said, I am sorry this picture is so blurry!  Here you can see how nice and neat this looks after I have sergered all three sides:


So, do this on all 5 panels, and then turn them and press.  Then you will take a piece of the needlepoint canvas and trim it just small enough to slip into the panel.  Trim it on the top edge short enough that there will be enough room on the top edge to sew the binding on the machine without the needle hitting the canvas.  So, you use your bias tape to close up the open end on each panel.  Skip the bias on one panel and just turn under your raw edges and topstitch.  Now you have 4 panels like this (and one without the bias binding):


I have decided to reverse my bottom panel, so the firetrucks will show and the red will be on the floor.
Now you want to sew four side panels along their bottom edge to all four sides of the bottom square:


Now, this has all come together quickly.  But because of the plastic panels inside, I have decided I will have to hand sew the sides together.  So thread a needle and sit down and carefully and neatly sew up three of the sides.  Catch the lining on both sides with your needle, right at their edges.  On the fourth side seam, sew a little more than halfway up, and then stop, leaving your needle still threaded.


Now you want to turn the box outside out before finishing this last seam.  I will tell you it was scary turning this; I was afraid of the plastic panels cracking....but it turns just fine, just have patience and go slowly.  Once you get it turned, finish sewing the side seam and tie off.  And Voila:

Toy Box from a Crib Sheet

You can see he has already pulled out a truck.  He likes his new toy box and has moved it into the other room and emptied and refilled it and emptied it again.  I am glad its roomy enough to hold all his trucks and more and I am sure that any little boy would be happy to have a box filled with trucks!  Plus, I see endless variations on this.  You could use something pretty and make a bin for your crafts.  Or what about making another panel with a flap to make a velcro-able lid and then having pockets on the outside or inside (or both).  You could make a little flap to secure it around a seatbelt and have a neat place to store books and toys between kids in your car.  Or make more, in graduated sizes, and then they could stack and nest.

I hope you will make one or many neat boxes and I know you will have fun!  Have a great day!