Hi, friends. If you are looking for a sewing project that is perfect for St Patrick's Day, then I have a tutorial for you. I made my very first sewing video for this post, too. Click over to Sewing Machines Plus Sew Blog to read the step-by-step tutorial for making this fun and easy-to-sew wall quilt. The video shows how to make the patchwork strips. There's a downloadable pattern for the four-leaf clover and all the info you need to sew this project for St Patrick's day or anytime.
I have to admit that I'm a little nervous about the video and especially about my Alabama accent being on Youtube, but I hope it is helpful and I hope you enjoy making this project.
I really appreciate y'all reading my work over at Sewing Machines Plus! Luck O' the Irish Flag Quilt Tutorial
Happy St. Patrick's Day and happy sewing to you!
Showing posts with label patchwork. Show all posts
Monday, February 27, 2017
Monday, January 30, 2017
How to Sew Valentines: 33 Valentine Sewing Project Ideas
I had some fun sewing valentine projects this weekend. I shared what I made, as well as thirty other sweet project ideas that I collected from all over the web on my newest post at Sewing Machines Plus. There are links to several cute quilts, other patchwork projects, a darling softie toy, kitchen gifts, and many more. I think you will find inspiration and ideas to suit everyone you love. Please click over there to read it now. I challenge you all to show your love by sewing all your valentine gifts this year. Thanks for reading!
Labels:
easy things to make,
gifts,
kitchen gifts,
patchwork,
quilting,
sewing,
Valentines
Wednesday, November 9, 2016
String-Pieced Crib Quilt Tutorial
I hope you all are okay today. I'm feeling blue, to be honest, so I thought I'd show off this blue quilt today. I posted the full step-by-step tutorial on how to make it over at Sewing Machines Plus, check it out: Blue Baby Crib Quilt Tutorial. This quilt was a lot of fun to make while I waited for a special little boy to be born. It doesn't have to be blue, of course; make it in whatever colors you like best.
Labels:
baby gifts,
easy things to make,
patchwork,
quilting,
scrap projects,
sewing,
tutorials
Friday, May 4, 2012
Easy I-Spy Scrap Quilt
It's been a long time since I posted something new here, and this twin bed quilt seems like a good project to share. I had been saving fabrics to make an I spy quilt for my son, and when we ordered his first twin mattress, I needed to make a twin bed quilt quick. I didn't want to just sew square after plain square of random novelty fabrics; I wanted to do something to unify the quilt. I am very happy with how this turned out, and I think the primary colored frames around the different I-spy prints work well to unify both the fabrics and the random collection of colorful toys that often litter my son's room! I looked online a few times and couldn't find a design for an I spy quilt like this, but I finally found something on google images that inspired me. That was this quilt, at Don't Call Me Betsy, which was the very first quilt she ever made! It's an easy idea and I decided to use it in order to both unify and speed along the construction of my bed sized quilt, which I needed to sew quickly!
I finished this quilt so quickly that it was done before hubby has even started building the bed!
I used 6 inch squares for the block centers and 3 inch strips to frame them, and then trimmed each block to 11 inches square. My son chose many of his I-spy fabrics, and some were such large prints that I used a few 11 inch square blocks without borders. He was insistent about that Thomas the Tank Engine fabric, and this one didn't work well in 6 inch squares. I used scrap and stash fabrics in primary colors to make the "frames," although for a few squares I used strips of the novelty I spy fabrics, when the print was small enough.
I used 2 of each fabric so he can also look for matches, as he likes matching games a lot right now. To make this twin quilt takes 35 blocks, in 7 rows of 5, so you need 2 each of 17 different fabrics, one of which you will use 3 times. To make this quilt harmonious, I stuck with a palette of mostly primary colors in the prints, and enhanced this by using reds, blues, and greens for the framing strips.
This is an easy, quick, I-spy quilt to sew that uses scraps but has a coherent quality that brings the diverse prints together in a fun way.
I am feeling quite quilt-y lately; I just finished a new top which I will quilt soon and I have a lot of quilt ideas swirling in my head, so I hope to make more posts again here soon. I hope you and yours enjoy a beautiful day today and that you all have a beautiful tomorrow, too! Happy Sewing!
Labels:
easy things to make,
gifts for kids,
patchwork,
scrap projects,
sewing,
tutorials
Sunday, May 8, 2011
Grandmother's Quilts
For Mother's Day, today, I gave my mother and Mr. Green's mother baby quilts that I made from blocks left by their mamas. Both of these dear grandmothers left a small stack of pieced blocks, and last year they were given to me. So I arranged and sewed together the blocks, and because in both cases there were less than enough blocks for a whole quilt, I added borders.
My husband's grandmother hand sewed the blocks in the quilt pictured above. I used the machine to sew them together and quilt it. I just love the pink, blue, and red color scheme, which is one I never would have thought to use. I didn't have enough of one binding for the whole quilt, and so I improvised using two blues!
The blue striped border continues around all four sides on this quilt. The blocks in the middle of this one were made by my great great grandmother, who was also my mama's "mother," through adoption. She passed away many years ago. When my mother gave me her quilting things recently and I saw these blocks, memories came flooding back. The fabric and color choices in this quilt could have only been chosen by her! I can remember seeing her hanging out laundry wearing a dress made from one of these fabrics.
I keep calling these grandmother quilts because they were started by grandmothers and I gave them to grandmothers, for holding new grandchildren. I made a bit of a mess in the quilting of these, as I always do- I love making patchwork, but not quilting as much. They turned out just fine, though, really. Both our mothers seemed pleased, and I feel pleased as punch to have finished these projects which were started by others so many years ago.
I hope all of you who are mothers have had an amazing mother's day this year!
Labels:
baby gifts,
gifts,
patchwork,
sewing
Tuesday, February 8, 2011
Easy Quilting Project: Make a Wall Pocket from One Block
I have been working hard on rearranging my sewing room and making a lot of improvements. I keep sitting down to make a post, looking at my photos, and thinking of another improvement to implement. I have a lot of new ideas to show you soon. For now, here is one little project I whipped up for my sewing room. I used a UFO block that was never going to be a quilt. I had planned to make a throw pillow cover from this block, but have since decided that we have more than enough throw pillows around here!
I always have a lot of garment pattern pieces tacked on my bulletin board, and this leaves no room for the other stuff I want to tack up. So I used this orphan quilt block and made a big wall pocket for holding whatever garment pattern pieces I am working with. I wrote a tutorial, too; here is the link to this easy quilting project. Please stop by and read my tutorial at AC!
Happy Sewing!
Thursday, January 20, 2011
Sew Soft Toy Blocks and Upcycle Baby Clothes
Please visit Associated Content to read my tutorial for keepsake baby blocks. I make my soft baby blocks differently by repurposing pieces of sweet baby clothes. Cute appliques make cute blocks, but using premade appliques from baby's clothes helps this project to make up super quick.
These are great for stacking and safe throwing. I think this is a cute way to upcycle and repurpose baby clothes that have been outgrown, stained, or ruined. They make great nursery decorations, too. These blocks are also a little addictive to make; my baby has a huge set of these because I am always coming across cute appliques and wanting to make just one or two more. Please read my tutorial and make some for a child you love! There are instructions included on how to get the jingle bell inside to jingle properly and not be muffled by the stuffing, as well as how to successfully make these using knit fabrics from baby onesies.
Thank you for reading my work at AC! I hope you enjoy this project as much as I do, and I hope the toys you make are played with and loved as well as our set! Happy Sewing!
Sunday, July 11, 2010
Gift Idea: Soft Balls for Baby
I am working on a tutorial for ya'll; I plan for it to be up later today. But it has been too long since my last post, so I thought I would share some links for this gift idea.
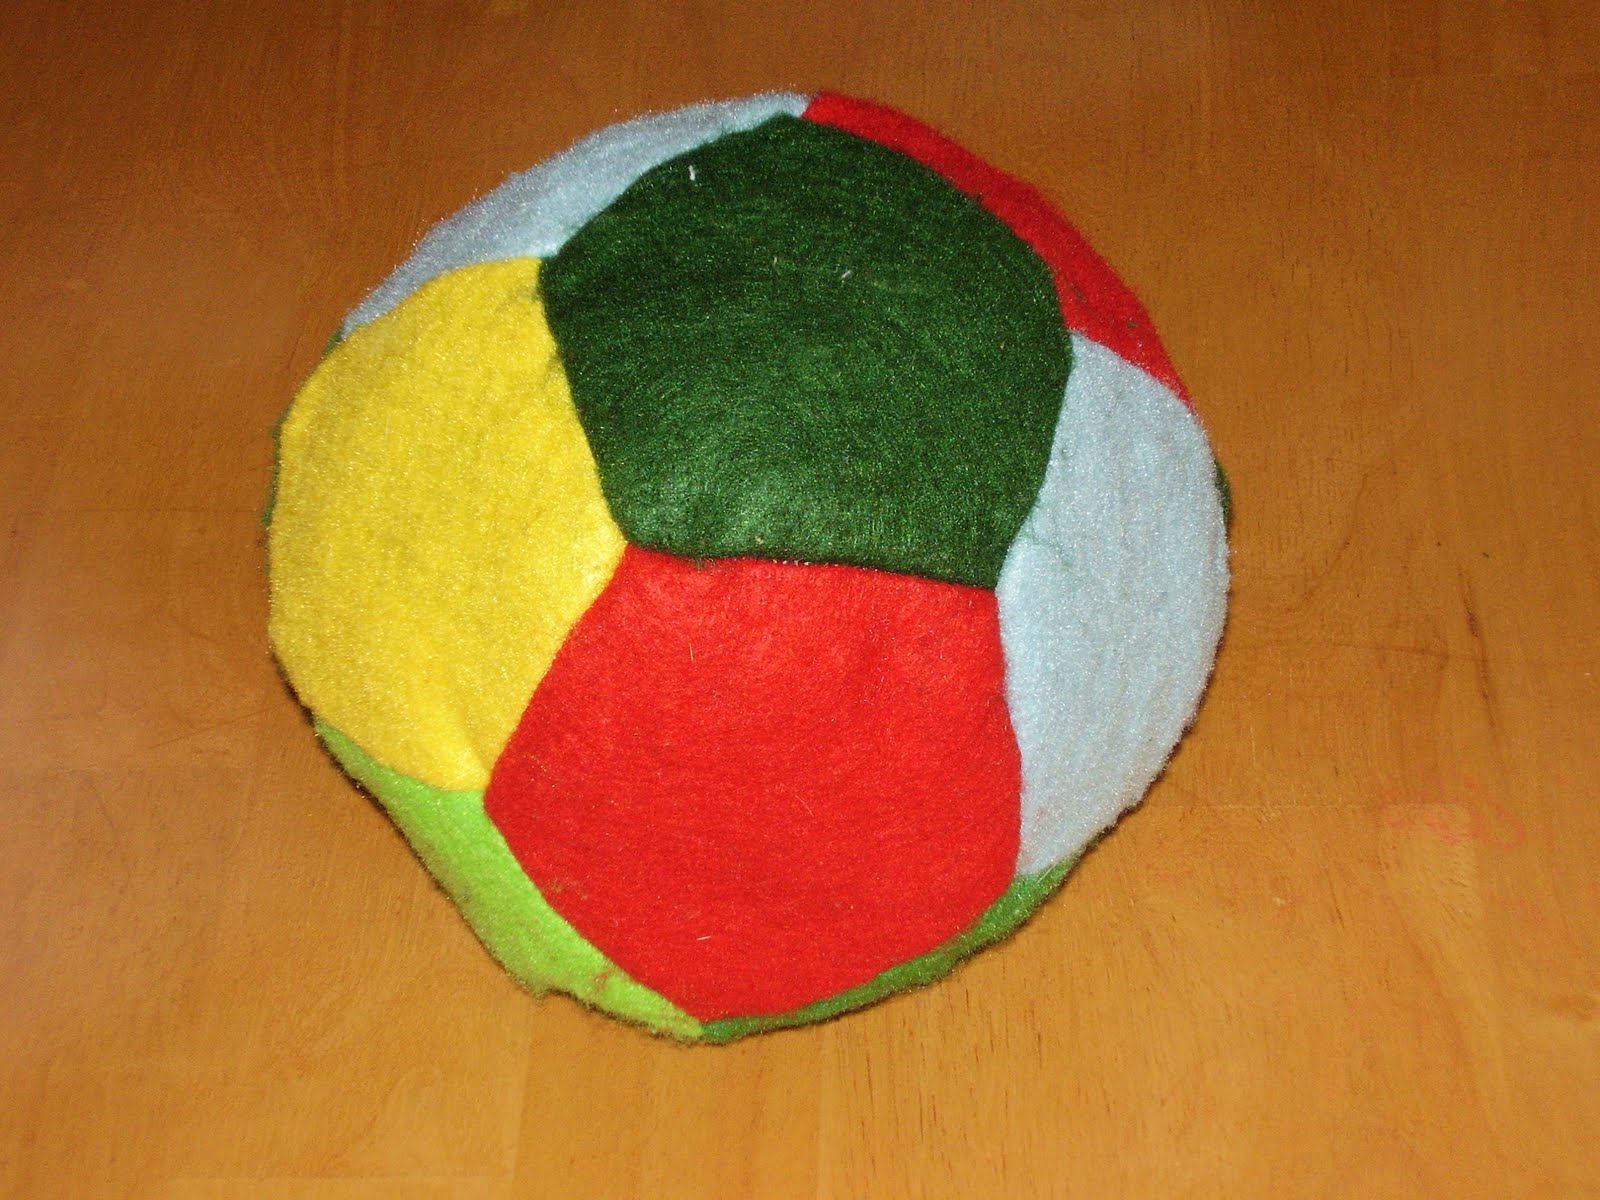
Here is the first soft ball I made:
I made this by cutting 12 pentagon shapes with 2 inch sides. You just choose one to use as the middle and sew 5 other pieces to that, one along each side. Then repeat, and sew these two halves together, turn, and stuff. I like to add a jingle bell, encased inside a small plastic container (like the capsules that hold vending machine toys, or a small plastic easter egg, taped closed).
After I made this "soccer ball" type soft toy, I found a different pattern at Grand Revival. This page includes patterns for making three different sized balls. The first ones I made were from felt, which I do not recommend. These balls will be played with a lot, and the felt gets pilly and kindof yucky. You can see that in this picture of the balls I made last year:
So, now I make these balls from regular cotton fabrics, and they turn out much nicer. Like I said, I like to add a jingle bell inside and also ribbon tags for grabbing:
Another thing I have done with these balls is add an applique. This is a photo taken before I had a digital camera, and I hesitate to post it because it is so bad, but it might inspire you to add something cute to the balls you will make:
So that should give you some ideas for cute baby or toddler gifts. I also found another cute way to make a soft ball that might be even better for a younger baby; this one has lots of places for a little baby to grab. I haven't made one like this yet, so I don't have pictures to show you. But there are pictures along with the tutorial for sewing this kind of soft ball at the Daily Skein.
Like I said, this is just a bonus post of sorts, while we wait on the next tutorial from me. I hope it will be up in a few hours. Until then, happy sewing!
Labels:
baby gifts,
easy things to make,
gifts,
patchwork,
sewing
Wednesday, July 7, 2010
Gift Idea: Colored Pencil/ Crayon/ Marker Rolls
I am sorry I am late with this post. Tuesday was a high intensity Mama day, as it rained, keeping my big boy inside, and my little guy wanted Mama to hold him all day. I wasn't able to even go in the sewing room until nearly midnight. And then, once I started making these, I kept thinking of someone else who would like one.
There are a lot of colored pencil roll tutorials to choose from, and every one I have seen is super cute. I started with one from Carson J. Designs, although I made a couple changes. I didn't have a cord stop, so I used ribbon instead. And I also added an inner layer. I have seen some tutorials call for a layer of flannel or fusible fleece. I used what I had, which was a piece of canvas curtain. I also used the serger to finish the edges, instead of turning...this speeds things up a lot. Here is a view of the inside of one I made tonight:
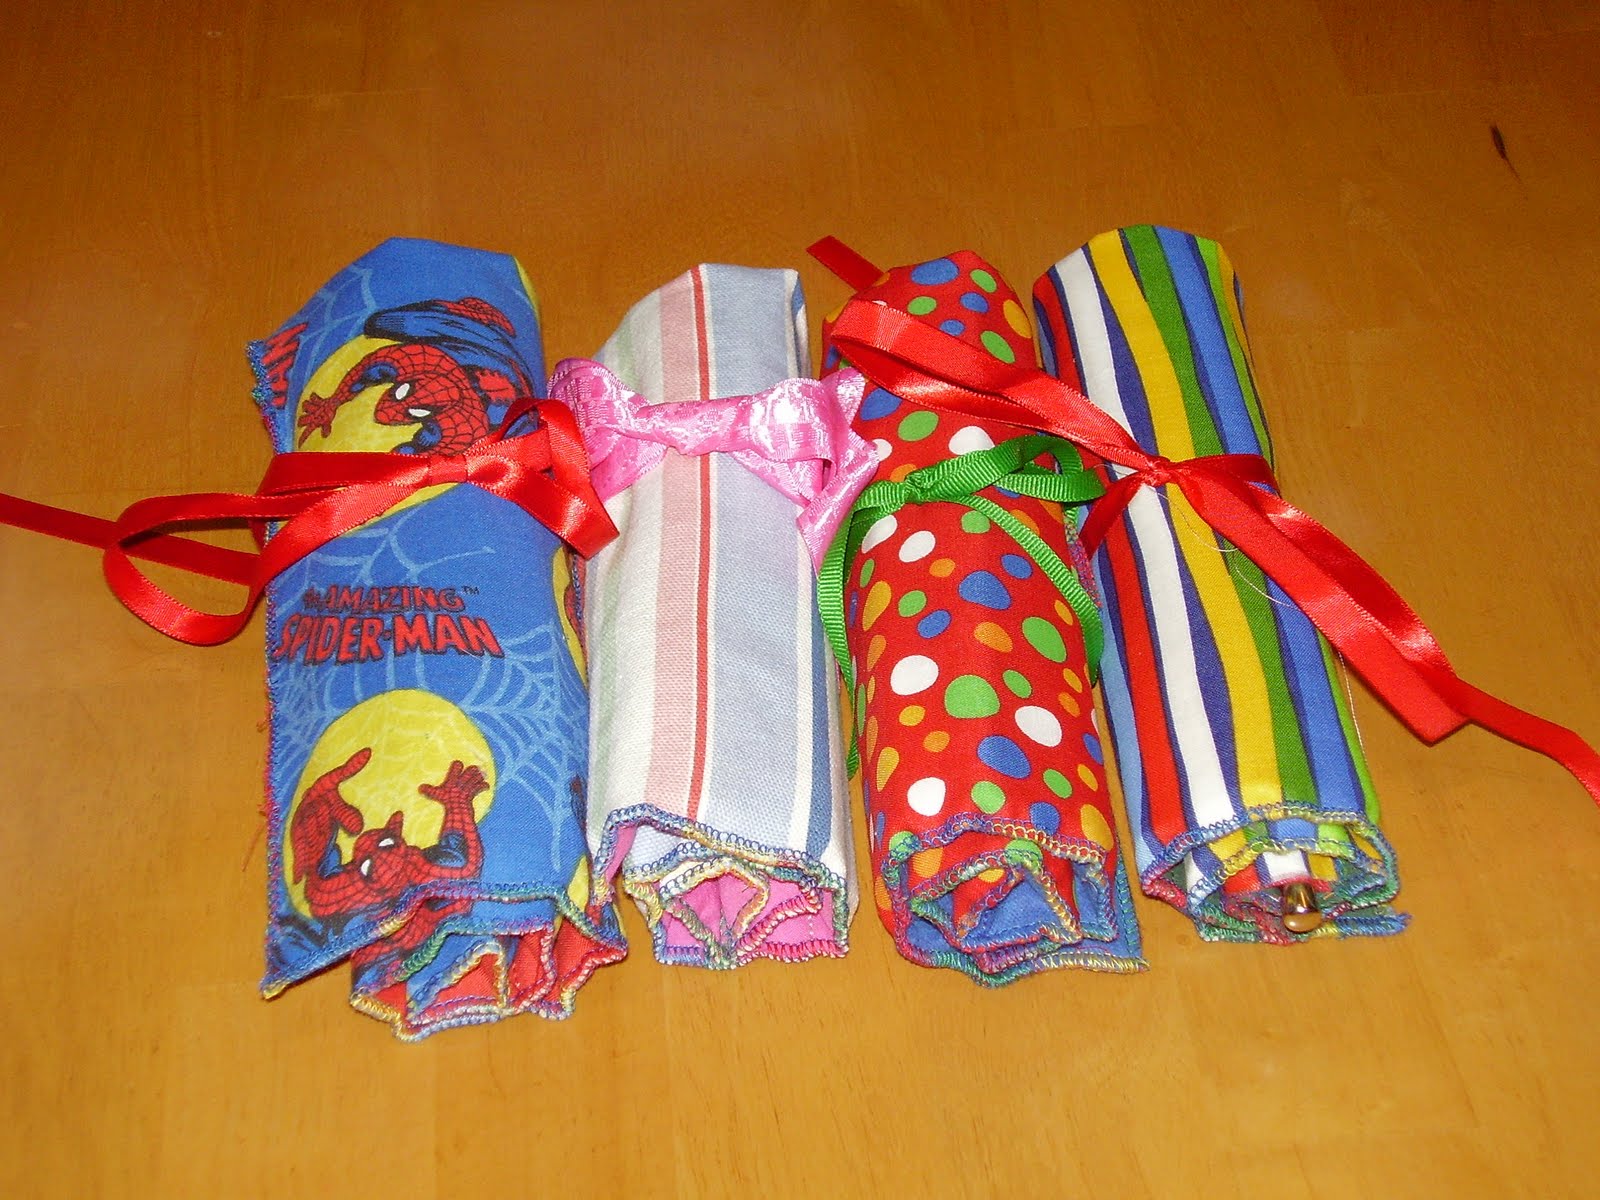
And then I made three more. The Spider Man is for a particular neighbor boy who is always wearing either one of two pairs of Spider Man shoes, or one of what must be a dozen different Spider Man shirts:
There are other tutorials for beautiful colored pencil rolls at You Go Girl and Pink Chalk Studio, and possibly elsewhere, as well.
After I finished these, I decided to do crayon rolls. I had seen pictures of precious rolls at Skip to My Lou, but the little boys I am making these for will need the fat kind of crayons. So I just kindof adapted the rolls I had just made, cutting the rainbow strips at 2" x 9":
I thought these should definitely have a fold down flap, to prevent the crayons being spilled in Mama's purse.
Here they are all rolled up:
I got all six of these gifts made in just about two hours, so you can see that these are quick and easy projects. I really like sewing the rainbow strips together; it's like making a little quilt.
It is 3 am now, so I must go to bed. If it wasn't so late I would like to make Fawnda's marker roll; there is a tutorial at Fireflies and Jellybeans. I would like to make one of these for my sharpies, as well as some for gifts. But that will have to be another day!
If you haven't seen my giveaway yet, please read this post. Next Monday my baby will draw a name from a hat to determine the winner of my patchwork needle book/ sewing kit. You need to comment on that post, or be a follower of this blog, for your chance to win it.
I am going to bed! I hope to see ya'll tomorrow.
Labels:
easy things to make,
gifts,
gifts for kids,
organizers,
patchwork,
serger,
sewing
Saturday, July 3, 2010
Happy Holidays Gifts: Sewing and Needle Book- You Can Win It!
Happy Saturday, Ya'll.
I haven't finished with the tutorial for this yet. I want to make it a pdf file (which I will share with my followers as a gift, and sell after that), but I have a little learning to do first. I hope you all don't mind waiting; I apologize!
But I can show you the first sewing and needle book I made. This is the gift I am giving away next week. And as I said, am working on making the instructions into a pdf file, so that you can make one for yourself or someone you love, too.
This is the front cover. This little book has a zippered pocket to hold folding scissors, a seam ripper, needle threader, and quilter's thimble. This little book is my original design; do not make these for sale. If anyone wants to buy one, they will be available in several different cover designs in my Etsy shop, opening soon.
Here is a look at the inside:
This book is not exactly perfect, as I wish I had not used that darker green thread to sew closed the zip pocket. Like I said, this was the first one I made! It works just fine and I think it is pretty.
This is the back cover. This project started when I bent to the scrap bag just to grab a little piece to test that orange/gold thread, which I hadn't used before. Something inside me told me to make something pretty while I tried out the thread. I made the patchwork piece that became the front cover, and when I looked at it, the idea for this little book just popped in my head!
I will announce the winner for this either Sunday evening or at the latest on Monday, July 12, 2010. Comment on this post for a chance to win it. Or, as I have said, to reward my loyal readers, if you are a follower of this blog I will put your name in the hat twice. Three times if you comment! I will let my 1 year old choose a name from the hat as the winner.
Good luck! Ya'll have a great day; I will be back real soon.....
Labels:
books,
gifts,
organizers,
patchwork,
sewing
Thursday, July 1, 2010
Favorite Scrap Sewing Project: Baby's Soft Book of Colors
I want to feature this soft book of colors to kick off the month. This was my favorite gift I made last year, and I loved making it so much that I had to make more. This is really a fun gift to make!
This is perfect for any baby on your list, from the not yet born to the toddler set. I promise you will love making this and the book will be well loved.
This tutorial is well done and made by a brilliantly talented mama named Jazmin. Here is her tutorial at Homegrown Happy.
Here is the first one I made:
I made the back cover brown for my son. I have made a pink back page when giving this to a girl.
Like I said, this was definitely the best gift I had yet made and I know you will be glad if you make one too.
I promise you will enjoy it!
Labels:
baby gifts,
easy things to make,
gifts,
patchwork,
scrap projects,
sewing
Friday, June 18, 2010
10 Easy Things to Make with a Serger
Read this article, 10+ Easy Things to Make with a Serger, at Associated Content. They pay me per page view, so I appreciate your click! All of these projects are fast and easy, and many will make excellent gifts.
I thought I was a beginner at serging. Well, I would have called myself an advanced beginner, but Ezine articles just sent me a notification that I qualify for expert status.
Here is another link to my serger review page. The 7034d Magnolia, linked above, is what I recommend buying RIGHT NOW, as the best deal going.
I thought I was a beginner at serging. Well, I would have called myself an advanced beginner, but Ezine articles just sent me a notification that I qualify for expert status.
LOL. THAT's how easy sergering really is! I went from absolute beginner to qualifying as an "expert" in a few short months. I'm telling ya'll, every home sewist needs a serger! Serging (with a Janome serger) is FAST and its FUN and its EASY.
Here is another link to my serger review page. The 7034d Magnolia, linked above, is what I recommend buying RIGHT NOW, as the best deal going.
If you shop around and research, you will know you want to buy a Janome serger from Amazon. Please bookmark this blog, and when you do buy your Janome serger (you will), and other products I recommend and review- and NOW is the best time- I thank you for buying through links here to Amazon. Please and thank you.
Labels:
easy things to make,
gifts,
Janome sergers,
patchwork,
serger,
sewing
Sunday, June 13, 2010
patchwork flag wall art quilt
(UPDATE: 6/27/10- Here are much better pictures of this flag!)
My dear wants me to show you his flag that I made for him.
I am sharing this here for personal use only; please do not make these for sale. I will open my Etsy shop soon, and will be taking orders for these myself.
The proper ratio for the flag of Ireland is 1:2, and so I made this to measure 21" by 42." Each colored section is made up of 7 2" strips string pieced with scraps of similar color. These strips are joined and then embellished by satin stitching on the green and orange sections. The white section is finished with echo quilting around the four leaf clover at 1/4" intervals. I first tried to use scraps on the four leaf clover, but we determined that the single green felt for the applique worked best. Here is a close up of the quilting:
Mr. hard worker has bragged endlessly about this flag at work and so a friend has requested a Scottish flag, which has been trickier, but the top is nearly complete. I have a date with the seam ripper to do a little bit of tweaking later. I will show pictures of that here too, once it is finished.
But first, I plan to share some ideas about organization and management of the sewing room, and share that little tutorial which will help with this task. -So stay tuned-
Speaking of which, my sewing room needs some management right now, as I have had a productive weekend, making multiple father's day gifts and even a christmas present, and a dress, slip, and purse. So I will be working on getting it back into order today and I will show you how my sewing room is organized soon..
I hope everyone has a very nice day!
Labels:
easy things to make,
gifts,
patchwork,
sewing,
tutorials
Subscribe to:
Posts (Atom)