Showing posts with label kitchen gifts. Show all posts

Monday, January 30, 2017

How to Sew Valentines: 33 Valentine Sewing Project Ideas


I had some fun sewing valentine projects this weekend. I shared what I made, as well as thirty other sweet project ideas that I collected from all over the web on my newest post at Sewing Machines Plus. There are links to several cute quilts, other patchwork projects, a darling softie toy, kitchen gifts, and many more. I think you will find inspiration and ideas to suit everyone you love. Please click over there to read it now. I challenge you all to show your love by sewing all your valentine gifts this year. Thanks for reading!

Wednesday, December 21, 2016

Last Minute Gifts to Sew


My latest post at Sewing Machines Plus is a list of quick sewing projects that are perfect for last minute gifts. There are quite a few easy, quick, no-stress gift ideas that are fun to make. Good Luck with all your projects, and Happy Holidays!

Wednesday, December 1, 2010

Ideas for Easy Gifts to Sew for Everyone on your list

If you are looking for ideas for gifts to sew, you will find lots of ideas in my sidebar here.

Please also read my article at Yahoo, Easy Gifts to Sew for Everyone.  There are more ideas there, as well as a very important link...if you do not yet know about the handmade holidays series that has been running all November for the past four years at SewMamaSew, then you will absolutely want to visit the link at the bottom of that article for scores of amazing gift ideas.

I am excited that yahoo just sent me an email to let me know that I have been accepted as a featured crafting contributor at Associated Content, so there will soon be many more crafting articles written by me on that site. I will still be sharing lots of ideas here, too, of course.  Here is the link to my contributor page  at Associated Content.  You can subscribe and be emailed whenever my new articles are published, and I would very much appreciate your readership there as well as here!

I am uber busy preparing for my first ever arts and craft booth at a local country Christmas fair this weekend, but I have a new tutorial for a sweet upcycled kid gift that should be posted here very soon, as well as other ideas to share.

In the meantime, Happy Sewing!

Sunday, November 28, 2010

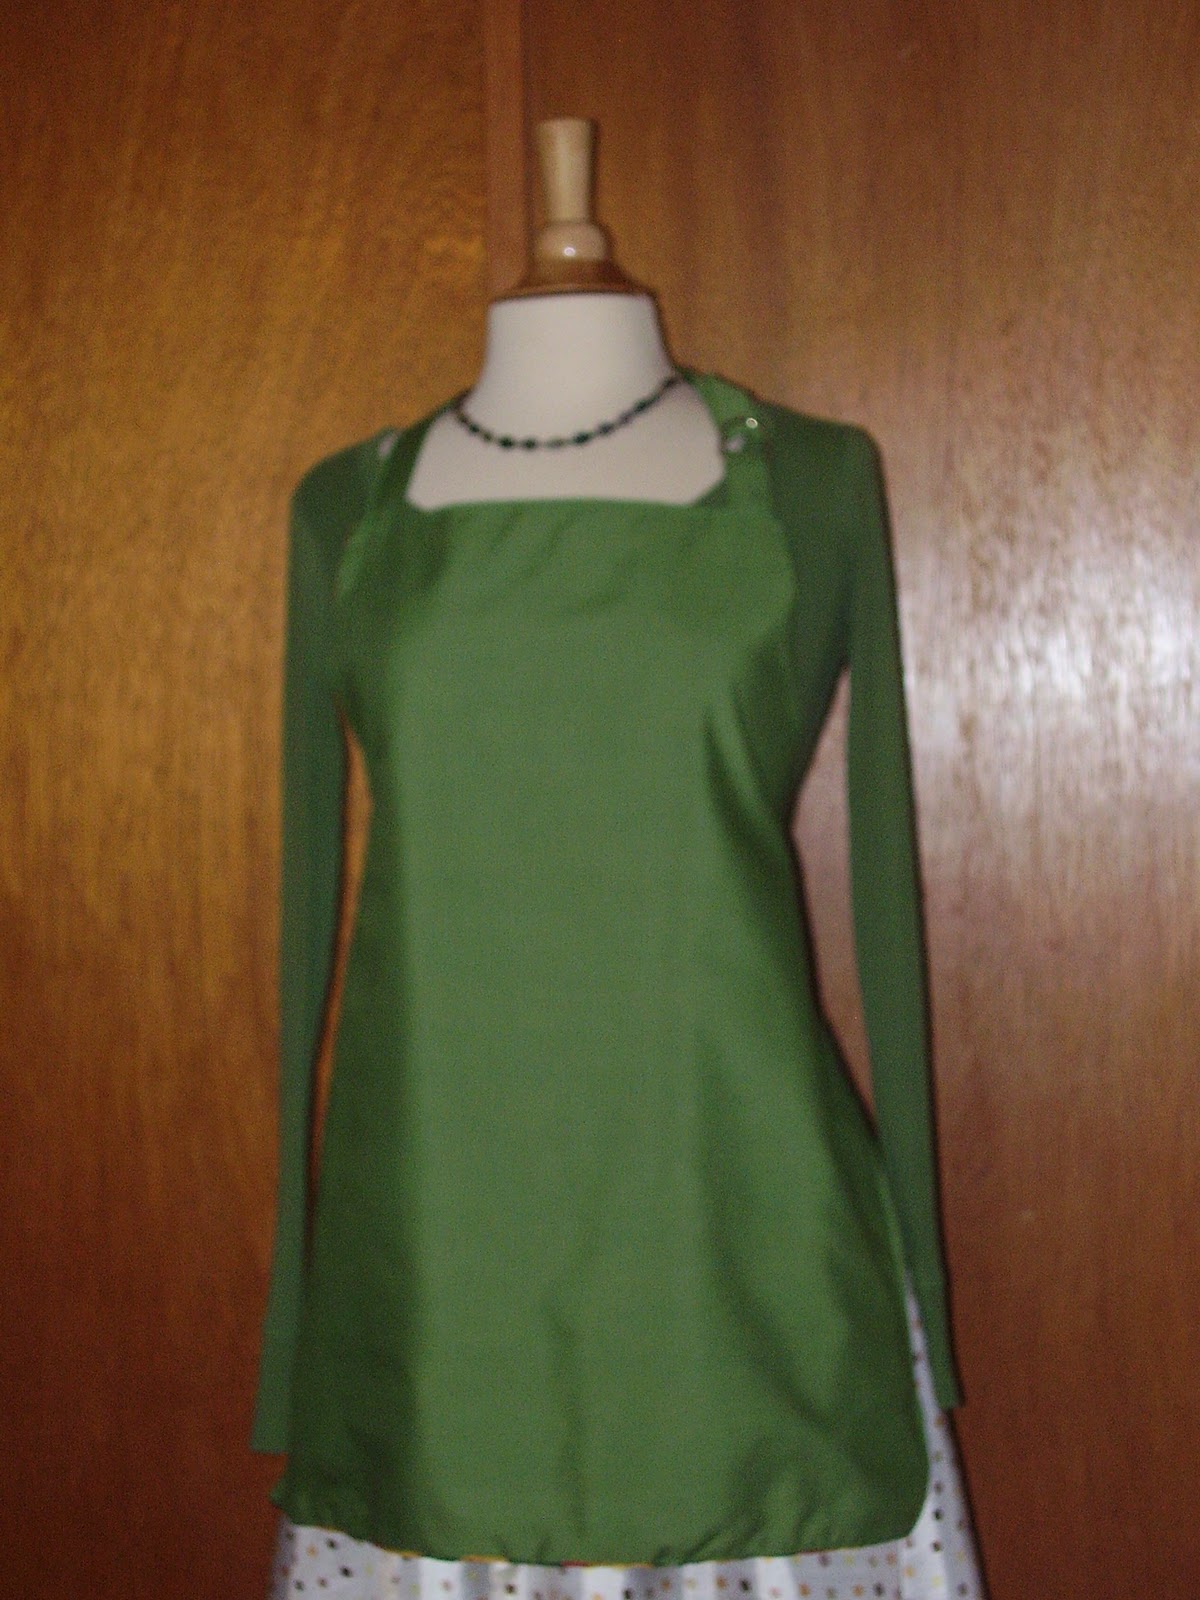
Here's Another Easy To Sew (Reversible) Apron

I showed ya'll some fat quarter aprons already, and now want to show you a full version.  I like this free pattern at Michael Miller fabrics, for the Classic Reversible Apron.  I made a couple as gifts last year and I recently sewed another 3 up quickly as a batch.  This pattern is super simple easy to sew.  I made these:


Mr. Green thinks I should have used a different fabric on the reverse of this:


But I had 3 full yards of this plue plaid, and it definitely matches.  I was thinking maybe the Mister could wear it this side out if he was cooking breakfast.  lol  I like the blue plaid!

Mr. Green LOVES this sweet peppers print apron

 
and I love the green on the reverse


I wish I had a lot more of that green fabric!  I made the straps for this one with the green, to save enough fabric from the sweet peppers yard to make a market bag, too.  Mr. Green wants this one, because we grow all these colored bells in our garden (and eat them most every night), and because this one is much better than the hot peppers one I sewed for him last year:


I don't really like the pocket on this one, that is one reason I omitted the pockets on these three I have made so far this year.  I also topstitched this one with white thread, which does not look good.  I was out of black, and it was like Christmas Eve, and I thought it might look okay.  Also, I did not have anything to match for the backing and so I RIT dyed muslin for the back, and I do not love the flourescent lime that resulted.  It's neat to see that my sewing skills have come a long way since last year...with sewing, you have fun making cool things, make mistakes, but effortlessly your skills magically improve!

Here is the other one I just made; this one is appropriate for a man or a lady:


This one has plain, clear red on the reverse.  Apparently, I didn't save that photo to the computer, so you can just imagine that one.  That skirt Dolly is wearing is the wrap skirt from Chic and Simple Sewing.  I messed up the hem and have a date with the seam ripper on that one, lol.  I have one more fabric I want to make this from, too, so I will likely post on this easy to sew, versatile skirt later.

This free apron pattern includes measurements for making adult and also child sizes.  I haven't made the pattern for the child size yet, but I plan to do that maybe today.  I have a yard of this:


I think I will use half to make the classic reversible apron for a child from this, and with the other border quarter I can make a matching fat quarter apron and that could be a matching set.  You can also barely see in this photo that red gingerbread man print from which I made napkins; there is enough left of this for me to make children's christmas aprons, so I plan to do that.

They also have a free tutorial for making a matching chef's hat at Michael Miller.  It, too, is easy to sew (you need patience for gathering the cap, though)!  A matching apron and chef's hat would make a beautiful gift for someone who loves to cook.  I made one of the hats to match Mr. Green's hot peppers apron last year, but he has a humongous head, so I had to alter the pattern a good bit.  Still it would not fit his head if I added the velcro, lol.  I had limited fabric left and had to figure out enlarging it a lot, so the circular cut should have been larger in proportion to the brim, which I made wider than the pattern.  Yours will look nicer than this!


I keep hearing from all directions that aprons are really "hot" right now.  They are super easy to sew and could make great gifts for someone on your list...or just make a cute one for yourself!  Happy Sewing!

i am linking this here:

Wednesday, November 24, 2010

Napkins are a Quick and Easy Gift to Make and Sew: Here are the Easy, Easier, and Easiest Ways to make them!

Napkins are a favorite gift of mine, because they are incredibly fast and easy to sew;  make up beautifully; and especially because they are a practical gift for the Earth as well as friends or loved ones.  I only use cloth napkins in my house, but am often amazed to see that many people use paper towels every day with their meals and serve them to guests.   I want every household I know to have beautiful matching washable napkins to use instead of paper products.

Cloth napkins are some of the simplest things to sew.  You can cut them to any size, press down all the sides 1/4", then fold and press again, and then sew around the perimeter of each napkin.  I made many napkins this way and this is definitely EASY.

You can make napkins this way without even having to sew them if you use Stitch Witchery no sew hemming tape.   I haven't made them this way myself, but I have seen it written many times by different knowledgeable people that this stuff works just fine and will hold up to myriad washings.  Make them this way and all you have to do is a lot of pressing, saving the sewing step; this is even EASIER.

But by far the quickest easiest way to make cloth napkins is using your serger.  Serging napkins (and handkerchiefs) are most likely the absolute simplest, easiest, and quickest projects possible.  You don't have to turn and press edges at all!  Just cut your napkins and run them under the serger.  You could make multiple sets in half an hour.  I like to use the rolled hem with most fabrics, or a picot edge finish also looks lovely.
Serging napkins is definitely the EASIEST way to make them!

If you make 12" square napkins, which is an oversized cocktail or casual (lunch) size, you can make a set of 8, as well as simple little bag to wrap and present and contain them, from just one yard of fabric.   Here are some made in this size from festive holiday fabric:


I made a set of these as my gift for the holiday bloganza, and sets to give as hostess gifts during the holiday season.

I also just made some from this gorgeous fabric, using metallic thread in the upper looper.  I have found metallic thread to be impossible to sew with using a sewing machine, but it works beautifully in the serger loopers.  Because this fabric made me think of celebrations so much, I used the leftover scrap to make a wine bottle carrier as well, and Mr. Green had the good idea for me to use insulated batting so it can help carry a chilled bottle of wine.  Wouldn't this set make a beautiful hostess gift for New Years Eve?  This set is for sale.


(I haven't sewed the straps on the wine bag yet)

Flannel makes super soft napkins.


I want to get more flannel to make large sets of large sized napkins like these.

I also like to make 16" napkins as my favorite size.  I just cut a stack of poinsettas with gold that I want to keep for my table. ;)


 Sew, No-Sew, and Serger are Easy, Easier, and Easiest ways to make fabric napkins which are quick, useful, and can be gorgeous gifts.  Ya'll make some for your holiday gifts, too!

Happy Sewing!

I am linking this post at these parties:


mmm button


giveaways


Tuesday, November 16, 2010

Easy Gift to Sew: Prudent Baby's Fat Quarter Apron

I have had such fun making these Fat Quarter Aprons (tutorial at Prudent Baby).  This is definitely one of the easiest and most fun tutorials I have come across this year.   This project would make a great gift for domestic types on your list. 

Here is the first one I made:


I did one thing different from the tutorial, which is use the entire fat quarter for the skirt of the apron, and use the contrasting fabric to make the waist band at the top.  Instead of using ready made trim, I used the contrasting fabric to make a ruffle.  I finished the ruffle in contrasting (dark green) wooly nylon thread with a serger rolled hem.  Here is a closer picture of the green rolled hem:


I REALLY love this apron!  It reminds me of bubbles and makes me want to wash dishes!

Then I made another one, too, from fabric I have been saving for just the right project.   I had a lot of fun with the applique on this; I will be doing lots more applique, I think.  I used wonder under and then sewed the edges using a satin stitch, except for the butterfly (fussy cut from a scrap of fabric), which I sewed using invisible nylon thread:


There is a slideshow at Prudent Baby with 100 different photos of aprons made by many talented people; you should check out for some serious inspiration for all kinds of different ways to make these unique.

I can't believe I didn't see any examples made for men.  I have an idea to use masculine fabric (without the ruffle) and applique "DAD" on one side.

You could make one with a pocket and slide in a new wooden spoon.  Or maybe make a matching set for a mother and daughter (or sisters).  Or make one (or more) reversible. There are myriad ways to make this a great gift!  Have fun with it!

Happy Sewing

I am linking this here:

Saturday, September 25, 2010

Luffa / Loofah Gourds: The Best Dishscrubbers You Can Grow


I probably won't be loom knitting anymore dishscrubbers, lol, because we have a huge harvest ready of Loofahs.   Many folks don't know Luffas are vegetables.  You can eat them if you harvest them when they are small (I want to try them for making bread), but if you let them grow on the vine, they will mature into fat vegetable sponges, which you can slice and use to scrub dishes (they work wonderfully on pots and everything else), or to give yourself (or a loved one) a vigorous scrubbing.  This could remove all kinds of toxins and impurities that might otherwise stay in your skin!  *You can just throw them in your washing machine to get them clean, too.*


Loofahs are wonderfully easy to grow, although they need a strong trellis or support.  Mr. Green built that lovely 12' foot trellis this year using 4x4s, a shovel, wooden lattice, and nails and screws.  But I have grown loofahs once before on a wooden swing support, or a fence could work fine, too.

Luffahs can be washed right in your washing machine!

The flowers are large and attractive.


When I grew these years ago, I followed instructions I found online that said to leave them on the vine until the sponges and vines turn to brown at the end of the summer.  I did this, and it worked.  But this year, I read further online, and decided to start harvesting these as they just start to lighten and discolor on the vine.  This is much preferable to me because they are much easier to peel when still partially green.  I just harvested them and then sat them on a table outside for only a day or two, turning occasionally.  Then I whacked them a few times against a step.  This loosened the skin, and even cracked it open in places....the sponges are then VERY easy to pull out of the skin, which just peels away.  When I did this with already fully dried brown sponges, it would flake away into lots of tiny pieces that had to be scraped off and peeling them took a lot longer.

But this way they are still wet and sappy, so you have to use a strong jet from the hose to wash them out really well, shaking out seeds.  Then I put mine back on the table outside to dry a few days, again, turning occasionally.  As I said, you can then slice them into about 3" slices (or whatever you prefer) to use in the kitchen, or use a whole sponge for the shower or bath.  You can also stuff one into a clean, empty pringle's can and then fill it with melt and pour soap to harden inside.  Once the soap has cured, you simply peel away the pringle's container and slice the scrubby soap into bars.  I would like to make some of these for Christmas gifts this year again, too.

I snapped a red zinnia, too, in the garden just now.  I planted these Scarlet flame Zinnias from seed and now they are nearly 6 feet tall.  There is a hummingbird or birds who are loving these; I see them often these days.  Zinnias are my favorite flowers, I think, mostly because they grow so well for me.  Besides the red, my favorites have been candy cane striped ones this year.  I think I planted only 3 different zinnia seed packets and that has been enough for as many bouquets as I would want in my house, as well as enough to continually share bouquets with several neighbors, the teacher, my mom, etc.

 
I hope you all have a nice day!

Tuesday, July 27, 2010

Mess Management and Holiday Idea: Casserole Cozies

Please excuse me ya'll, for taking so long between this post and the last.  I told ya'll that I make a mess, and I had to spend a whole day cleaning my big mess in the sewing room so I could think and sew.  It was pretty ridiculous in there.  The day before that, because of the mess, I spent making other things, not sewing.  Then I started working with the softest yarns I have ever felt and making what I hope will be beautiful, my first scarf, honeycomb knit in two contrasting blues, a gift for my sister.

But I did finally clean the sewing room really well, and now I feel so much better!  I am going to try to implement a new rule with myself, to clean up after I complete each project.  I tend to want to run on to the next project.  But mess upon mess accumulating beneath me contributes to insanity, lol, so I am going to work on cleaning up after myself throughout the day.  We'll see how it goes....

And now for our project.  When I got my copy of One Yard Wonders, this was the first project I saw that I knew I really needed to make.  When I saw it, I immediately thought of last year, Christmas Day.  We were supposed to already be at Grandmother Green's house and I was standing in our kitchen, looking at the hot dish from the oven, and wondering how on earth I was going to get it to Grandma's house.   Mr. Green came in and assisted, and we wrapped it in towels and nested it inside of a collapsible beer cooler.  I was embarrassed when Mr. Green had to walk into the party carrying that!

So I made this:


It will fit several different casserole sizes and shapes, including one considerably larger than the one that is inside in the picture.  My sister told me she does not have one and would love one, so I made this:


I did not then have any more one yard cuts I wanted to use to make more.  I did have a bit of the John Deere fabric remnant I had bought for my other sister, to make the oven mitt I showed you already, and so I used it for the straps and made this:


The last one I cut out, I cut from a partially ruined storebought quilt that came from Mr. Green's grandmother's house.  I also used part of a quilted poly blanket that wouldn't be soft for a bed and that was given to me to reuse.  I thought I wanted to use the quilt sides on the outside, and have the pink stripes showing on the inside bottom:


But now I am thinking I should turn the bottom piece over with the quilt showing on the inside and have the stripes on the table side.   Any opinions??  I want to get more binding before I finish it, but should wait until notions are half off at Hancocks Fabrics, on August 13.

I think this casserole caddy makes a great gift.  I plan to be on the lookout at the thrift store for some glass casserole dishes to give inside of them.  Don't ya'll think that would make an amazing hostess gift, to show up with something delicious for the party, in a pretty and practical package the hostess can keep?  I  thought about making one from holiday fabric for this purpose, but I decided that is too limiting, as I will want to use mine all year.  But there is your perfect present for someone who has everything already and who loves having Holiday "Stuff."  She would probably love to have a Holiday theme cozy for her casserole!

This pattern is great because it fits different sizes and shapes of dishes, and also because of the design of the straps.  Mr. Green pointed out how you can just slide it over your arm to carry, and have your hands free for carrying presents or whatever else.

Seriously, if you sew and you haven't gotten One Yard Wonders yet, buy it now!
I appreciate you ordering at Amazon through my links.

This book has 101 projects (and full sized patterns).  I am thinking I will probably wind up making about 96 of them.  Maybe more.  I assure you you will find many projects in this book that you want to make too.  There are clothes for ladies, babies, and children- even the dog; adorable toys; awesome things to make for the home; a selection of beautiful bags; precious things for pets; and plenty more.  It has been the best book buy I have made for my sewing library.  You should get it now for yours!

Have an amazing day and Happy Sewing!  I will be back here real soon.

Sunday, July 18, 2010

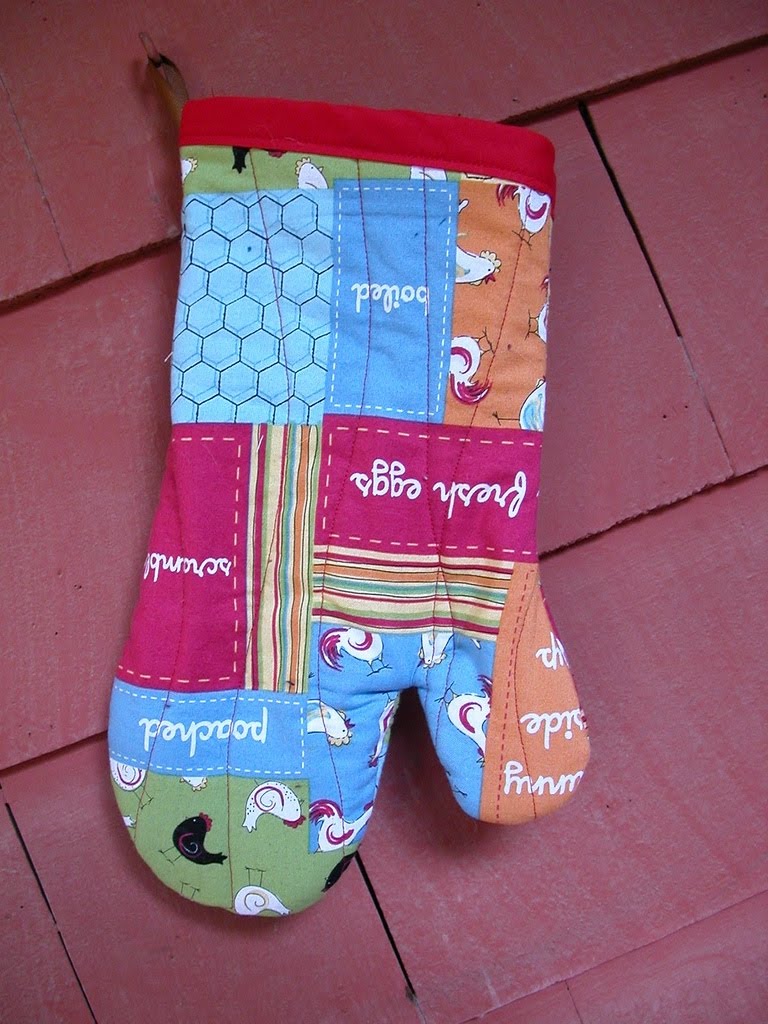
Kitchen Gift Idea: Oven Mitts


My friend Hilary made these oven mitts; aren't they adorable?


 I thought this was a great idea for an easy gift to sew.  Simple quick projects like this are the perfect way for me to make sure that everyone I know will get something handmade by me for the holidays.  I sewed some of these for father's day gifts but they are gone now so I cannot show photos of those.

But I did sew a few today to stash away in my Santa Sack:

for a couple who have John Deere everything in their kitchen

This one is for Mr. Green; I omitted the hanging loop on his because we stash ours in a drawer.

This one is for a guy who works on a boat and who soon will be a Captain.

I am quite sure I will be sewing lots more of these for gifts this year.  Like I said, they are super easy and quick to make.  You can easily sew several in a day and you will feel so satisfied to know that you are already working on your gift list!  

If you really feel like you need a pattern and instructions for making these, I noticed they have a pattern for oven mitts, and also a hot pad, in the One Yard Wonders book.  But what Hilary and I both did is to just use an existing oven mitt we had already.  Just turn it inside out and trace to make your pattern.  You can either use things like old towels or flannel blankets or quilt batting to make it thick inside, or you can buy insulated batting, which makes the middle layers not as thick and easier to sew.  Just cut 2 pieces of your cute fabric and 2 pieces for lining, assemble as a quilt with the batting in the middle, and quilt all three layers together on both pieces.  Then I attach the binding to the bottom edge before I put them right sides together and sew. Then you just clip your corners and turn and you are done.  Simple, easy, satisfying, and cute.

If you have an hour, why don't you go make some now?  Have fun!   I will be back son with more gift ideas to make.  Have a great day!

Thursday, July 8, 2010

The Best Dish Scrubbers You Can Make

UPDATE: I called mine the best, but it's the nylon yarn that makes these scrubbers the best for scrubbing.  I just found another pattern, at Rostitchery, for a nice compact round scrubber.  I am off to make one of these now; it might be better than mine. 

If you don't think that dish scrubbers make a good gift idea, I encourage you to look next to your friends and family members' sinks.  I have been so surprised to see that people who wash their hands, brush their teeth, and vacuum their floors often have a nasty, yucky, gross, old sponge on their sink ledge for washing dishes.  This is disgusting, people!  I care about my friends and family and I want to save them from the billions of germs that live in such sponges, so I think a pair of these makes an excellent gift.  These dish scrubbers can go in the washing machine and dryer, so with one to use and one to wash, your loved ones can always have something fresh and clean for scrubbing dishes.

This was the first design I came up with for the Knifty Knitter long looms.  All you need to make one of these handy dandy little scrubbers is the pink short loom, 2 skeins of nylon yarn, and an hour.


You can make these with one skein of nylon yarn and one ball of cotton, but cotton tends to stay damp longer.  Using nylon yarn gives these scrubbers their scrubbing ability and it dries out fast.

Wrap your loom as directed, using both strands of yarn.  Knit the piece until it has reached 5 inches, and then loom off, leaving tails approximately 7" long.


Then, take the short ends and bring them together.  Use one of your yarn tails to sew these edges together, behind the first row, creating a ridge, which will be your handle.  Then, center the handle in the middle, on the top layer of the scrubber.  Then use your other yarn tails to sew this top layer down to the bottom layer, keeping the handle ridge centered, and closing the open edges.

 
And here is what one looks like when you are done.  These are the best things I have found for scrubbing dishes; they are strong and scrub well.  The handle is handy and being able to wash these makes them sanitary and clean.  A pair of these makes a nice gift, especially when coupled with handmade dish scrubbing soap.  There are various ways to make liquid soap, but the easiest is to start with liquid castile soap.  I use Dr. Bronner's lavender.  Squeeze this into a pretty bottle, add warm water, a little glycerine, and some lavender essential oil, and you're done.

This is my original design; do not make these for sale.  But have fun making these for yourself and as gifts.

UPDATE: Now, after I made and posted this, I have seen another scrubber, designed Rowena at Rostitchery, that looks even neater than mine, as it is round.  I think it is a good bit smaller, though, and haven't tried her way yet.  I am going to make one her way now, but I wanted to post this and apologize to Rowena for proclaiming my scrubber the "best!"  Here again, is the link to the neat round scrubber at Rostitchery.

Update:  I have had a lot of folks asking where to find the nylon yarn for making these.  I like using the "Bonnie" brand the best, and they do carry it at Amazon.  Here are some links
There are other colors available, too.