Hi, friends. If you are looking for a sewing project that is perfect for St Patrick's Day, then I have a tutorial for you. I made my very first sewing video for this post, too. Click over to Sewing Machines Plus Sew Blog to read the step-by-step tutorial for making this fun and easy-to-sew wall quilt. The video shows how to make the patchwork strips. There's a downloadable pattern for the four-leaf clover and all the info you need to sew this project for St Patrick's day or anytime.
I have to admit that I'm a little nervous about the video and especially about my Alabama accent being on Youtube, but I hope it is helpful and I hope you enjoy making this project.
I really appreciate y'all reading my work over at Sewing Machines Plus! Luck O' the Irish Flag Quilt Tutorial
Happy St. Patrick's Day and happy sewing to you!
Showing posts with label sewing. Show all posts
Monday, February 27, 2017
Thursday, February 16, 2017
Guide to Embroidery Software and Designs
There is a wide array of embroidery software and design choices available
When I shared an embroidery machine buyer’s guide last week, I did not touch on the subject of embroidery software and downloadable designs. That’s because you don’t need to buy any software or additional designs to start creating on an embroidery machine.But once you have gotten comfortable with your machine, chances are you will want to expand your capabilities and design options by investing in more designs and/or software.
Without a good understanding of the different options, this subject can be just as confusing as choosing a machine. Let’s look at the different types of embroidery software and additional designs available in order to gain a clear view of the different types of software and other options available for extending your possible embroidery designs. Your choices include:
- Design collections
- Membership club
- Digital downloads
- Editing software
- Lettering software
- Digitizing software
- Thumbnailers
- Cataloging programs
Designs on disc
An easy investment to start building a larger library of embroidery designs is to purchase collections on CD-ROM. There are a ton of options to choose from in this category. Each will include many designs within a particular theme.A great choice for these is Anita Goodesigns, which offers a huge collection of gorgeous designs. Sewing Machines Plus has fifteen pages of different Anita Goodesigns to choose from, including:
- Baby designs, from vintage to cartoon-style, and everything in between
- Holiday, seasonal, and religious motifs
- Animal designs, both whimsical and realistic
- Butterflies, dragonflies, and bugs
- Fruits, vegetables, and baked goods such as cupcakes and donuts
- Foliage and flowers galore
- Faeries
- Customizable designs for your sewing club
- Mandalas
- And plenty more
VIP Club
Individual design collections on disc are an inexpensive way to start expanding your design library. But if you are like me, you will want them all! Buying all the individual collections separately would require a tremendous investment. But luckily, the folks at Anita Goodesigns realize that we will want them all, and so they made it easy for us to get them with their membership club.The VIP club gives you ALL of the designs previously released, and then sends you the new designs that are released throughout the year. Plus, they include more member benefits, such as all the quilt and cutwork designs, as well. To read about all these benefits and extras, head over to the Anita Goodesigns Club page.
Digital downloads
You can find many designs online, through Etsy and elsewhere, available as digital downloads.You need to know which file format your embroidery machine requires before downloading designs. Different machines require different formats and other formats are not compatible. For example, most Janome machines use .JEF files, Singer uses .XXX, Brother and Babylock generally use .PES format. Be sure to choose the correct format for your machine when downloading designs. However, if you own editing software, which we will discuss next, you can convert design formats.
You can find some free designs for digital download online. It is also possible to get premium designs for free. For example, Floriani includes a POP coupon code for a free design download on the label inside each package of their stabilizers. Once you collect ten of these codes, you can redeem them for ten design downloads. You will need stabilizer for all your embroidery designs. Floriani stabilizers are high-quality and are available in all types and weights. So the free download bonus packaged inside makes choosing these stabilizers a no-brainer.
You can also get five free Floriani downloads every month after you buy their Total Control software, which we will discuss soon.
Embroidery software for editing
Editing software will allow you to do many things, such as:- Resize designs and recalculate stitches
- Merge designs
- Convert thread brands
- Colorize
- Add lettering, including large letters
- Convert design formats to the type your machine accepts
- Overlap designs
- Change or remove individual colors in a design
- And more
Embroidery software for digitizing
If you want to stretch your creativity further and make your own designs, then you need digitizing software. This type of software will take a piece of clipart, a vector drawing, or other image and convert it into an embroidery design. Digitizing software will also convert fonts from your computer into letter embroidery. They can do lots of other amazing things, too; for example, you can use them to convert regular embroidery designs into cross stitch.Many folks consider Floriani digitizing software to be the best. It is a super high quality all-in-one program which covers every possible editing and digitizing function. It also comes with the added benefits of having tons of tutorials and other help available online, and the five free design downloads a month that I mentioned previously here.
I prefer a different option, however. I’ll be going with the Artistic Suite and Artistic Premium upgrade for my own embroidery software, and here’s why:
The Artistic Suite and Premium software costs less and includes more. This software goes beyond embroidery and includes a slew of helpful applications for quilting, appliqué, reverse appliqué, fabric cutting, heat transfer, and making elaborate rhinestone designs. It is also useful for scrapbooking applications, and will make cut-outs from most anything, including paper, foam, and even balsa wood.
Artistic Suite does all these things as an editor, and the Premium upgrade adds digitizing capabilities. I’m amazed by everything I can do with these programs, and I can buy both of them without spending an arm and a leg! The Artistic program is available for both single needle and multi-needle machines.
Embroidery software: thumbnailers and cataloging
The Embrilliance thumbnailer is a little program that you won’t want to be without. And the price is so nice that there is no need not to pick this up right away.This program collects all your embroidery designs into one place on your computer and lines them up as thumbnail images so that you can easily them all. Without it, you have to search and view every design individually, which can cost a lot of time and cause much frustration. But there is no need to waste any time or be frustrated at all when this solution is so simple. It is compatible with both PC and MAC.
There is another option for cataloging your designs into categories on your computer. That is Floriani’s My Design Album. This program is easy to install and will find all the various embroidery designs on your computer and compile them into one easy-to-find place. Then you can set up categories to find these designs more easily. The Design Album includes some editing capabilities as well.
You can find all of the options I have listed at Sewing Machines Plus at a great price, and with free shipping, too.
Labels:
embroidery,
sewing,
software
Wednesday, February 8, 2017
How To Choose an Embroidery Machine: A Buying Guide
Which embroidery machine should you buy?
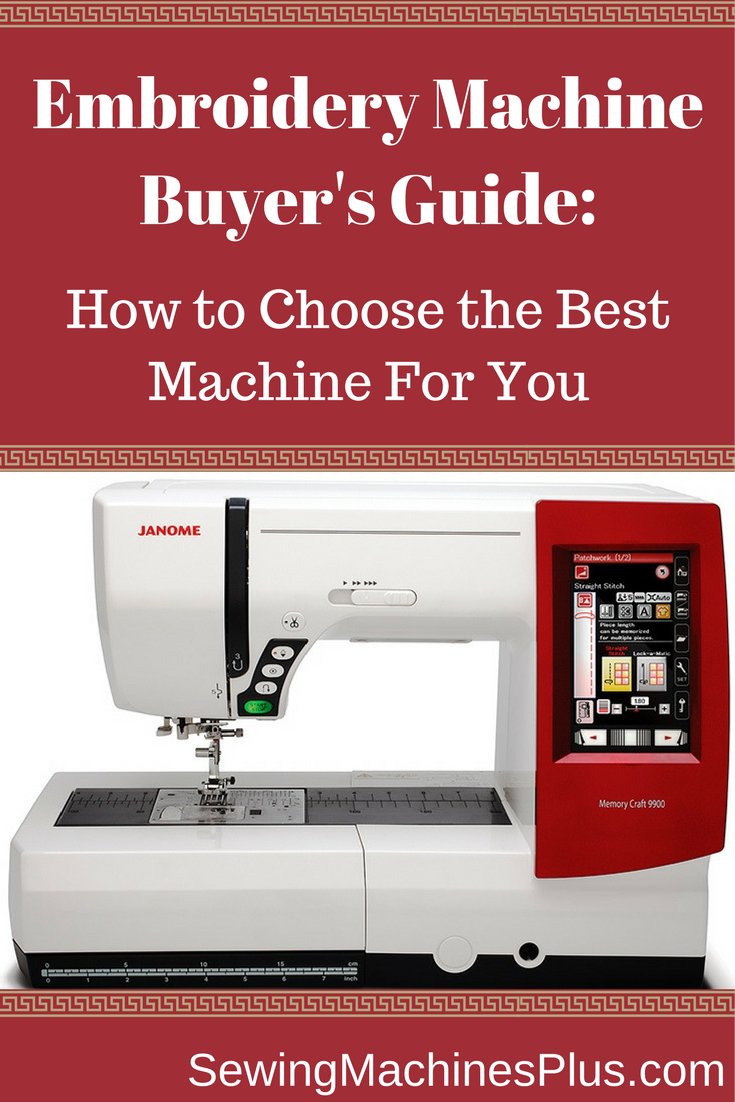
Here’s an embroidery machine buyer’s guide to help you decide
But there is no need to be overwhelmed. For the last several weeks, I have studied this issue to get a clear idea of how to choose the best embroidery machine. I have tested and played with every machine I could get my hands on. I also poured over the details for most every embroidery machine on the market.
And I talked to Torrie Root, the super helpful Sales Manager at Sewing Machines Plus. We talked more than once for a long time and I asked her a ton of questions. She answered all my questions in depth. She also sent me more info so I could study this question further.
I have compiled everything I learned into this embroidery machine buyer’s guide. Hopefully this will help you decide which embroidery machine to buy to suit your needs best.
Embroidery machine considerations
There are several things to consider when buying an embroidery machine. These include:
- Cost and Value
- Embroidery field and hoop sizes
- Design library
- Connectivity
- Display quality
- Embroidery only vs combo machine
- Extra features
Cost and value
Because embroidery machines tend to cost more than regular sewing machines, you want to get the most value for your money. You also want to ensure that you choose a machine that will serve you happily for many years. It would be a waste of your money to go for a model that you will soon outgrow.
Your embroidery machine is an investment and you want to choose the best machine you can afford.
For me, I know an entry-level machine will not satisfy me for long. I will want more and better features than a basic machine comes equipped with. So I would rather save up for a little while to be able to afford a higher quality machine that I can grow with, rather than one I will soon outgrow.
Embroidery field and hoop sizes
Many embroidery machines are limited and can embroider only a small area. Some of these lower priced machines have an embroidery field of only four inches square!
I know I will want more creative freedom than a four inch square field, and I bet you will too.
There are many options for machines that come packaged with multiple hoops in different sizes. And most of these machines offer other hoop sizes and shapes that you can purchase separately to use with these machines, too. I definitely recommend choosing a machine that offers you multiple options for hooping.
Design options and connectivity
Different machines are loaded with different sized libraries of embroidery designs. Some have many more than others. And some offer prettier and more useful designs. I looked at a few machines that had boring designs and nothing much that I would actually want to use. Of course you will want to choose a machine that offers you plenty of embroidery designs that you like and will want to use.
However, you can also download and/or purchase additional designs online or on disc, so you will not be limited to the design library that comes with your machine.
Some machines make this easier to do than others, however. There are some embroidery machines which require an actual computer connection for additional designs, while others have a USB port so that you can use a little flash drive for transferring extra designs, instead.
This makes more sense if your computer is a desktop in the den, for example. I wouldn’t want to have to connect my embroidery machine in the den; that computer desk doesn’t have enough space for an embroidery machine. So I’ll definitely buy one with a USB port so I can sit at my computer in the den to shop and download designs and then easily bring the designs to my sewing room on a thumb drive.
Display
Here’s another reason why I know I don’t want a basic model embroidery machine: there is a drastic difference between the displays of different machines. Some offer only a tiny window and no clear picture of the designs to choose from.
I want a clear view of the design I am embroidering, and I don’t want to have to consult the book or connect to the computer every time I use my machine. This is an important consideration when you are making multi colored designs, for example. I want a display where I can see at a glance an actual picture of the design in full color.
Embroidery only or combo machine?
Since I already have a sewing machine that I really love, I was thinking that I would be able to get the best value for my money by going with an embroidery only machine. I figured I didn’t need to spend money on sewing capabilities when I am already well equipped for sewing. I also thought it would be more efficient to switch between two adjacent machines for two functions rather than having to switch functions on the same machine between tasks.
I’ve changed my mind about this, however. That’s because most of the better machines are combination sewing and embroidery machines. This is great because a machine that both sews and embroiders offers more bang for your buck. And these machines are larger with more sewing features and space than most regular sewing machines have.
If you are a quilter like me, you will really appreciate the extra space these machines offer. It is not likely that your favorite sewing machine is as nice as your new sewing and embroidery machine will be! So in addition to adding an embroidery machine to your collection, you will be adding your new favorite sewing machine, too.
There is one reason you might prefer to go with an embroidery-only machine, however. If you plan to operate a home business and do a ton of embroidery, you may want to consider a multi-needle machine. This kind of home embroidery machine will complete your designs more quickly.
Multi-needle embroidery machines are also the only machines that will do a good job with embroidering hats. Torrie told me that all the combination models have a little trouble with this task, so if you think you will want or need to do embroidery on hats, you will want to consider this type of embroidery-only machine.
Helpful features:
Some embroidery machines are complicated to use. Extra features ensure ease of use and add a lot of extra value to some machines. Here are some helpful features that you might really want your machine to have:
- Automatic thread tension – When your machine automatically adjusts the thread tension, there is no chance of mistakes due to improper tension.
- Thread trimming – Trimming all your threads by hand can be a pain. A machine that automatically clips all your threads for you will save a lot of time.
- Embellishment capability – In addition to regular embroidering, you may also want to be able to do sequins and beadings. Some machines offer attachments that will enable you to attach these.
- Archable fonts – Allow you to curve your lettering. This offers more design freedom and can look a whole lot more attractive than straight monogramming when combined with other designs.
- Onscreen editing – On some machines, you can’t edit designs much, if at all. Many machines allow size editing of no more than 20%. A few machines offer greater size editing, and some allow you to create your own designs by offering corners and borders which can be combined with other design parts.
- Variable speed – Some machines have variable speed controls, which you can set to start slowly and gradually speed up.
- Knee lifter – This handy gadget lets you use your knee to lift the presser foot, leaving your hands free.
My choice:
I thought I was in the market for an embroidery-only machine, but after carefully considering every option available, my choice for the best machine for me is the Janome Memory Craft 9900 combo machine. On this machine, you can sew with the embroidery unit attached, so you don’t need to reconfigure the machine when switching between functions.
The Memory Craft 9900 offers 175 different embroidery designs, including pieces and parts for creating your own designs, and 200 sewing and quilting stitches. It has archable monograms, a knee lifter, and all the other helpful extra features I have already listed. Plus a full color display and much more.
This exceptional machine is packed full of value with way too many extra features for me to list here. Instead, I’ll invite you read all about it at Sewing Machines Plus.
I am a Janome loyalist because I have consistently found Janome machines to offer the most user-friendly features and best value for my money. Though the MC9900 is not Janome’s most expensive machine, it offers top-of-the-line features. And Sewing Machines Plus is throwing in hundreds of dollars worth of extra attachments, for free. All this is why I see this model embroidery machine as clearly the best choice for me. If you are looking for a great value for an exceptional machine, I recommend that you choose this one, too.
Check out this and all the Janome embroidery machines using this link.
Labels:
embroidery,
sewing,
sewing machines
Monday, January 30, 2017
How to Sew Valentines: 33 Valentine Sewing Project Ideas
I had some fun sewing valentine projects this weekend. I shared what I made, as well as thirty other sweet project ideas that I collected from all over the web on my newest post at Sewing Machines Plus. There are links to several cute quilts, other patchwork projects, a darling softie toy, kitchen gifts, and many more. I think you will find inspiration and ideas to suit everyone you love. Please click over there to read it now. I challenge you all to show your love by sewing all your valentine gifts this year. Thanks for reading!
Labels:
easy things to make,
gifts,
kitchen gifts,
patchwork,
quilting,
sewing,
Valentines
Monday, December 5, 2016
Sewing Machine Needles 101
Have you broken machine needles while sewing? Or have you had thread break or ravel? All this and more can happen when you use the wrong needle for your project. The good news is that it is easy to know which is the right needle to use when you understand the types and sizes of needles available.
If you could use a little education on the differences between different sewing machine needles, head over to Sewing Machines Plus to read my article, Sewing Machine Needles 101. I hope it will help you.
Labels:
sewing
Wednesday, November 9, 2016
String-Pieced Crib Quilt Tutorial
I hope you all are okay today. I'm feeling blue, to be honest, so I thought I'd show off this blue quilt today. I posted the full step-by-step tutorial on how to make it over at Sewing Machines Plus, check it out: Blue Baby Crib Quilt Tutorial. This quilt was a lot of fun to make while I waited for a special little boy to be born. It doesn't have to be blue, of course; make it in whatever colors you like best.
Labels:
baby gifts,
easy things to make,
patchwork,
quilting,
scrap projects,
sewing,
tutorials
Tuesday, November 8, 2016
Felt Flower Pincushion Tutorial

I posted the tutorial for how to sew this easy felt flower pincushion on the blog at Sewing Machines Plus. This is my absolute favorite pincushion. I also make flowers like this to adorn all kinds of other things, too. This project can also be stuffed with lavender flowers to make a sweet sachet, and it makes a lovely gift either way. Thanks for clicking over to read my projects on the sew blog at SMP.
Labels:
easy things to make,
sewing,
tutorials
Friday, May 4, 2012
Easy I-Spy Scrap Quilt
It's been a long time since I posted something new here, and this twin bed quilt seems like a good project to share. I had been saving fabrics to make an I spy quilt for my son, and when we ordered his first twin mattress, I needed to make a twin bed quilt quick. I didn't want to just sew square after plain square of random novelty fabrics; I wanted to do something to unify the quilt. I am very happy with how this turned out, and I think the primary colored frames around the different I-spy prints work well to unify both the fabrics and the random collection of colorful toys that often litter my son's room! I looked online a few times and couldn't find a design for an I spy quilt like this, but I finally found something on google images that inspired me. That was this quilt, at Don't Call Me Betsy, which was the very first quilt she ever made! It's an easy idea and I decided to use it in order to both unify and speed along the construction of my bed sized quilt, which I needed to sew quickly!
I finished this quilt so quickly that it was done before hubby has even started building the bed!
I used 6 inch squares for the block centers and 3 inch strips to frame them, and then trimmed each block to 11 inches square. My son chose many of his I-spy fabrics, and some were such large prints that I used a few 11 inch square blocks without borders. He was insistent about that Thomas the Tank Engine fabric, and this one didn't work well in 6 inch squares. I used scrap and stash fabrics in primary colors to make the "frames," although for a few squares I used strips of the novelty I spy fabrics, when the print was small enough.
I used 2 of each fabric so he can also look for matches, as he likes matching games a lot right now. To make this twin quilt takes 35 blocks, in 7 rows of 5, so you need 2 each of 17 different fabrics, one of which you will use 3 times. To make this quilt harmonious, I stuck with a palette of mostly primary colors in the prints, and enhanced this by using reds, blues, and greens for the framing strips.
This is an easy, quick, I-spy quilt to sew that uses scraps but has a coherent quality that brings the diverse prints together in a fun way.
I am feeling quite quilt-y lately; I just finished a new top which I will quilt soon and I have a lot of quilt ideas swirling in my head, so I hope to make more posts again here soon. I hope you and yours enjoy a beautiful day today and that you all have a beautiful tomorrow, too! Happy Sewing!

I finished this quilt so quickly that it was done before hubby has even started building the bed!
I used 6 inch squares for the block centers and 3 inch strips to frame them, and then trimmed each block to 11 inches square. My son chose many of his I-spy fabrics, and some were such large prints that I used a few 11 inch square blocks without borders. He was insistent about that Thomas the Tank Engine fabric, and this one didn't work well in 6 inch squares. I used scrap and stash fabrics in primary colors to make the "frames," although for a few squares I used strips of the novelty I spy fabrics, when the print was small enough.
I used 2 of each fabric so he can also look for matches, as he likes matching games a lot right now. To make this twin quilt takes 35 blocks, in 7 rows of 5, so you need 2 each of 17 different fabrics, one of which you will use 3 times. To make this quilt harmonious, I stuck with a palette of mostly primary colors in the prints, and enhanced this by using reds, blues, and greens for the framing strips.
This is an easy, quick, I-spy quilt to sew that uses scraps but has a coherent quality that brings the diverse prints together in a fun way.
I am feeling quite quilt-y lately; I just finished a new top which I will quilt soon and I have a lot of quilt ideas swirling in my head, so I hope to make more posts again here soon. I hope you and yours enjoy a beautiful day today and that you all have a beautiful tomorrow, too! Happy Sewing!
Labels:
easy things to make,
gifts for kids,
patchwork,
scrap projects,
sewing,
tutorials
Saturday, July 16, 2011
New to Sewing Help: How To Start Sewing on a Vintage Singer Sewing Machine
Hi! I am writing this post to help someone who has acquired a vintage (or "old") Singer sewing machine with no manual and is anxious to start sewing. Others have told her to order her manual. I agree, reading your manual is the number one first thing to do to start sewing.
But if you must wait to get your manual, I have taken some pictures which I hope will help you to get started right away. Because really, the best way to learn to sew is to sew. And I want you to get started as soon as you can!
Your Singer may be different than mine, of course, but hopefully you might be able to figure out what to do for your machine from seeing how mine (ca. 1960) is set up.
Step 1: Wind the Bobbin
The first thing to do is to loosen the stop motion screw (so the needle will not go up and down while the motor is winding the bobbin). You do this by turning the larger disc on the handwheel away from you, while simultaneously turning the smaller wheel towards you.
Use two hands for this, I am using one in the picture because I needed the other hand for the camera.
Then you will set a spool of thread on the spool pin in the front of the machine, making sure the thread is leaving the spool at the front. Pull the thread through the tension discs to the right of the spool. Place an empty bobbin on the bobbin pin, which is on the top right of the machine in front of the handwheel. Pull the thread up (making sure it is engaged in the tension discs), and bring it through the inside of the bobbin and out through a hole on the left side of the bobbin.
Hold onto the thread tail, and then press the bobbin winder down towards the handwheel. Then start the machine, using either the foot pedal or the knee pedal, if your machine has one. Hold onto the thread end until the bobbin has wound around a few times, after which you can stop winding, clip the thread end and keep winding until your bobbin is full.
Then you will stop the machine, of course, and lift the bobbin winder back up, away from the handwheel. Cut the thread, and remove the bobbin. Tighten the stop motion screw by turning it in the opposite direction as before. That is, turn the larger wheel towards you and the smaller screw/ wheel away from you.
Step 2: Inserting the Bobbin
The way the bobbin fits into the machine is probably the biggest difference between machines, and I don't think that all Singers have a drop in bobbin like mine does. For this kind, you simply inset the bobbin with the thread leading forward from the left side. Pull the thread first towards the front and then towards the left to engage it in the slot under the spring. Pull out a few inches of thread.
The needle is already threaded in that photo; I am about to tell you how to do that!
If your bobbin is not top loading like this one, then you will need to remove the bobbin cover and place the bobbin in that casing, thread it through the slot, and replace the bobbin cover....it looks completely different than this! Hopefully you can see how it is assembled when you unassemble it and then reassemble it again in the right way! Good luck!
Step 3: Threading the Machine
Turn the power to the machine OFF.
Turn the handwheel towards you to bring the needle to its highest position. Place a spool of thread on the top spool pin, making sure the thread is unwinding from the front. Thread it through the first thread guide, at the top of the machine. Then take the thread down, running it behind the next thread guide, on the front of the machine. Then thread it between the tension discs and back up, pulling it to engage the little hook
Here is a closer picture to show you how the thread will look when properly engaged and threaded through the tension discs:
You see, it will come up under the tension discs, and then it falls behind the little metal finger and down through the little round hook to the left of the discs...then it goes up and you thread it through the take up lever (see previous photo), which is the metal "eye" you will see sticking out in he front of the top of the machine.
Then the thread heads down towards the needle. On this machine, the next thread guide is to the left on the outside of the machine. Then you pull it down and behind the guide at the top of the needle clamp. Then you will thread the needle and pull the thread under the (raised) presser foot. You will find the lever for raising and lowering the presser foot on the back of the machine behind the needle.
The thread guides on your machine may be slightly different than mine, though! You just want to make sure that you pass the thread behind every single guide, because if you miss one you might lose your thread and frustrate yourself.
Step 4: Raising the bobbin thread
Pull several inches of needle thread off to the left of the needle. Hold onto the end of the thread and turn the handwheel toward you, lowering the needle into the machine, keep turning until the needle comes back up, bringing a loop of bobbin thread up with it as well. Pull out this loop until you have a few inches of bobbin thread coming out of the machine, pulled towards the left with the needle thread.
Step 5: Starting to Sew
Place your fabric under the needle, and lower the presser foot. Turn the handwheel towards you to lower the needle into the fabric.
Use your left hand to gently guide your fabric. Turn the power to the machine on.
Use your foot or knee pedal to sew a couple of stitches forward, and then sew in reverse to "lock" your stitch. To do this, just lift the stitch length regulator upwards using your right hand, and hold it a couple seconds to sew in reverse, then press it back down to begin sewing forward again.
When you reach the end of your seam, sew in reverse for a couple of stitches again to lock the stitch down on that end as well.
And now (I hope) you are sewing! I hope this helped and good luck!
But if you must wait to get your manual, I have taken some pictures which I hope will help you to get started right away. Because really, the best way to learn to sew is to sew. And I want you to get started as soon as you can!
Your Singer may be different than mine, of course, but hopefully you might be able to figure out what to do for your machine from seeing how mine (ca. 1960) is set up.
Step 1: Wind the Bobbin
The first thing to do is to loosen the stop motion screw (so the needle will not go up and down while the motor is winding the bobbin). You do this by turning the larger disc on the handwheel away from you, while simultaneously turning the smaller wheel towards you.
Use two hands for this, I am using one in the picture because I needed the other hand for the camera.
Then you will set a spool of thread on the spool pin in the front of the machine, making sure the thread is leaving the spool at the front. Pull the thread through the tension discs to the right of the spool. Place an empty bobbin on the bobbin pin, which is on the top right of the machine in front of the handwheel. Pull the thread up (making sure it is engaged in the tension discs), and bring it through the inside of the bobbin and out through a hole on the left side of the bobbin.
Hold onto the thread tail, and then press the bobbin winder down towards the handwheel. Then start the machine, using either the foot pedal or the knee pedal, if your machine has one. Hold onto the thread end until the bobbin has wound around a few times, after which you can stop winding, clip the thread end and keep winding until your bobbin is full.
Then you will stop the machine, of course, and lift the bobbin winder back up, away from the handwheel. Cut the thread, and remove the bobbin. Tighten the stop motion screw by turning it in the opposite direction as before. That is, turn the larger wheel towards you and the smaller screw/ wheel away from you.
Step 2: Inserting the Bobbin
The way the bobbin fits into the machine is probably the biggest difference between machines, and I don't think that all Singers have a drop in bobbin like mine does. For this kind, you simply inset the bobbin with the thread leading forward from the left side. Pull the thread first towards the front and then towards the left to engage it in the slot under the spring. Pull out a few inches of thread.
The needle is already threaded in that photo; I am about to tell you how to do that!
If your bobbin is not top loading like this one, then you will need to remove the bobbin cover and place the bobbin in that casing, thread it through the slot, and replace the bobbin cover....it looks completely different than this! Hopefully you can see how it is assembled when you unassemble it and then reassemble it again in the right way! Good luck!
Step 3: Threading the Machine
Turn the power to the machine OFF.
Turn the handwheel towards you to bring the needle to its highest position. Place a spool of thread on the top spool pin, making sure the thread is unwinding from the front. Thread it through the first thread guide, at the top of the machine. Then take the thread down, running it behind the next thread guide, on the front of the machine. Then thread it between the tension discs and back up, pulling it to engage the little hook
Here is a closer picture to show you how the thread will look when properly engaged and threaded through the tension discs:
You see, it will come up under the tension discs, and then it falls behind the little metal finger and down through the little round hook to the left of the discs...then it goes up and you thread it through the take up lever (see previous photo), which is the metal "eye" you will see sticking out in he front of the top of the machine.
Then the thread heads down towards the needle. On this machine, the next thread guide is to the left on the outside of the machine. Then you pull it down and behind the guide at the top of the needle clamp. Then you will thread the needle and pull the thread under the (raised) presser foot. You will find the lever for raising and lowering the presser foot on the back of the machine behind the needle.
The thread guides on your machine may be slightly different than mine, though! You just want to make sure that you pass the thread behind every single guide, because if you miss one you might lose your thread and frustrate yourself.
Step 4: Raising the bobbin thread
Pull several inches of needle thread off to the left of the needle. Hold onto the end of the thread and turn the handwheel toward you, lowering the needle into the machine, keep turning until the needle comes back up, bringing a loop of bobbin thread up with it as well. Pull out this loop until you have a few inches of bobbin thread coming out of the machine, pulled towards the left with the needle thread.
Step 5: Starting to Sew
Place your fabric under the needle, and lower the presser foot. Turn the handwheel towards you to lower the needle into the fabric.
Use your left hand to gently guide your fabric. Turn the power to the machine on.
Use your foot or knee pedal to sew a couple of stitches forward, and then sew in reverse to "lock" your stitch. To do this, just lift the stitch length regulator upwards using your right hand, and hold it a couple seconds to sew in reverse, then press it back down to begin sewing forward again.
When you reach the end of your seam, sew in reverse for a couple of stitches again to lock the stitch down on that end as well.
And now (I hope) you are sewing! I hope this helped and good luck!
Friday, July 8, 2011
Sew Easy Laptop Sleeve with Pockets and a Free Camera Case Pattern
Hi! I want to show you a couple of easy projects and point you to another fun website, too.
I recently wanted to make a laptop sleeve, but all the patterns I found were missing a feature I wanted, which was large pockets. I looked around at a lot of cool free patterns available online, and you can find some great ideas by doing this, too.
But there are very nice instructions in the One-Yard Wonders book
for a quilted laptop sleeve, and I decided to use these for the measurements of the sleeve portion. Their project example is made from a darling patchwork print and has the pattern for an adorable doggie applique. But I wanted to make this project quickly. So I did not follow their instructions of quilting this, and instead just basted the bag, padding, and lining pieces together around all four sides. I did this with the serger. You could also use spray adhesive to attach the three layers together.
To make the pocket, I simply made another 3 layered piece with the same dimensions around, and just a couple of inches shorter than the bag piece. I simply hemmed the top edge of this piece and then layered the pocket piece on top of the bag before I sewed it together. Now there is a roomy pocket on both the front and the back of this laptop sleeve that can easily hold a power cable and a jump drive, even an ipod and cable, or whatever you need. Here it is, with a power cord and battery stuffed in the back pocket:
There is bias binding at the top (opening) edge, and I also used bias tape strips a couple of inches long, sewed closed and attached as loops to the top corners. Then I added key ring loops. I was thinking this would be for a strap, but with these dimensions that is awkward. What would work better if you wanted to make this bag with straps would be to attach them at the top and bottom corners (when you sew the sleeve together), to make it a backpack. Anyway, the key loops on the edge are handy, after all, for pulling the sleeve in and out of a larger bag or from beneath the couch or something.
Free Camera Case Pattern
I used the scraps from this project to make a bag for my camera. I found a great free pattern (along with a lot more, too) at AllPeopleQuilt; here is the link. I did quilt this one. I also noticed that their case was going to be a good bit big for my camera, and so I modified the measurements accordingly.
You can see a strip of bias binding along the bottom in the back; that's because I decided to make this with a pocket, too, for holding the usb cable and a spare pair of batteries.
I should have used velcro on this pocket, though, as my batteries fell out in my purse when I carried my camera along! The USB wire fits snugly in here though, so you could skip the velcro, too, but also make smaller battery pockets on the inside or outside of the side panels. This doesn't need a strap, as you will use the camera strap for carrying it.
I would love to know if you try one of these projects. And I will love to make another post soon.
Happy Sewing!
I recently wanted to make a laptop sleeve, but all the patterns I found were missing a feature I wanted, which was large pockets. I looked around at a lot of cool free patterns available online, and you can find some great ideas by doing this, too.
But there are very nice instructions in the One-Yard Wonders book
To make the pocket, I simply made another 3 layered piece with the same dimensions around, and just a couple of inches shorter than the bag piece. I simply hemmed the top edge of this piece and then layered the pocket piece on top of the bag before I sewed it together. Now there is a roomy pocket on both the front and the back of this laptop sleeve that can easily hold a power cable and a jump drive, even an ipod and cable, or whatever you need. Here it is, with a power cord and battery stuffed in the back pocket:
There is bias binding at the top (opening) edge, and I also used bias tape strips a couple of inches long, sewed closed and attached as loops to the top corners. Then I added key ring loops. I was thinking this would be for a strap, but with these dimensions that is awkward. What would work better if you wanted to make this bag with straps would be to attach them at the top and bottom corners (when you sew the sleeve together), to make it a backpack. Anyway, the key loops on the edge are handy, after all, for pulling the sleeve in and out of a larger bag or from beneath the couch or something.
Free Camera Case Pattern
I used the scraps from this project to make a bag for my camera. I found a great free pattern (along with a lot more, too) at AllPeopleQuilt; here is the link. I did quilt this one. I also noticed that their case was going to be a good bit big for my camera, and so I modified the measurements accordingly.
You can see a strip of bias binding along the bottom in the back; that's because I decided to make this with a pocket, too, for holding the usb cable and a spare pair of batteries.
I should have used velcro on this pocket, though, as my batteries fell out in my purse when I carried my camera along! The USB wire fits snugly in here though, so you could skip the velcro, too, but also make smaller battery pockets on the inside or outside of the side panels. This doesn't need a strap, as you will use the camera strap for carrying it.
I would love to know if you try one of these projects. And I will love to make another post soon.
Happy Sewing!
Labels:
bags,
easy things to make,
fat quarter projects,
gifts,
one- yard wonders,
sewing,
tutorials
Saturday, May 14, 2011
Scrap Stash Organization
Hi! I am so happy to say that I finally, FINALLY got my large scrap stash organized.
I prefer not to throw anything out that could be put to good use, and I am thankfully blessed with the good sense to be able to imagine a use for any scrap. But having all my many scraps of all different sizes and shapes and contents stuffed into a big "barrel" pop-up hamper was definitely not working for me!
I have worked so hard on getting and keeping my sewing room clean and organized, and this was the last problem to solve. I want to make art quilts to raise money for Alzheimer's (see the link in my sidebar), but I have been avoiding making any scrap projects because the barrel issue made such a mess. First, let me show how it's all better now:
Here is a picture I took the last time I made a scrap project, to show what a ridiculous mess this scrap storage system would make. Before I moved the scraps up to the barrel, I used a smaller version of this messy system, a scrap bag or basket. This has always been a mess and much less than optimally organized!
I love keeping my sewing room clean and organized and I am so glad I finally got this big problem solved!
I searched around on the internet for various scrap management ideas and I stopped to read this post at quiltville, Scrap User's Organization System. When I sew her system, I thought AHA!
So I decided my baby son really didn't need those plastic drawers in his closet, and that I needed them more!
Here's how I sorted my crazy mess of scraps into a workable order:
The top drawer holds red, orange, yellow, purple, and black and brown quilter's cotton scraps. I see now that they are not in that order! I was working quickly to get this done. It took me a full day and a half to do this project, by the way.
I have a lot of blue and green cotton scraps, as these are my favorite colors- so they each got a bin. The pink bin holds both pink scraps, and also pink pieces that are as big as a full yard. The smaller bins hold small scraps of felt and silk. I don't actually keep the bins on top of the drawer unit, but rather stash them neatly beneath my sewing table, which is well within arms length. I can pull them out and put them on top when I need to work with them.
This middle drawer holds "crumbs:" These are little small scraps to be used for string piecing and such. The maximum size for the Alzheimer's Art Quilts is, I think, 10 by 12 inches, so I know I will be able to make something using even the smallest crumbs. These small scraps are confined using a white open bin, so that this drawer can also hold muslin and batting scraps that can be used in making these small quilts or other little scrap projects (such as my favorite scrap project, soft crazy quilted color books for baby)..
This bottom drawer holds scraps from sheets I have already cut, a bag of plaid scraps, and a ziploc with denim and corduroy scraps, as well as some patterned white and light neutral quilter's cottons. So it is kindof a miscellaneous drawer.
I had a lot of scrap knits, but no good bin to fit them; this reusable bag is the perfect size. So for now, the knit scraps are in here, stashed under the sewing table next to the bins.
There is a couple more categories of scraps that I save. One is the "stuffing scraps." I stuff tiny pieces, even thread chains and serger trimmings, and small batting scraps, etc, into a drawstring garbage bag, which I use for stuffing things like pillows and toys. Someone recently gave me an antique wardrobe which I am using as my "sewing room closet," although it doesn't fit in the sewing room and is at the end of our hall instead. That "closet" holds the bag of stuffing scraps, a bag of larger felt scraps, and also some sheets I haven't cut yet, interfacings, and some other things.
I also have two large shoebox bins, one holds apparel fabric scraps for making Barbie doll clothes, and the other has novelty scraps, which I am collecting to make an I-spy/ Alphabet quilt sometime soon.
The last step to make this system workable is one more basket, empty now. This is also stashed under my sewing table and I can use this to store daily scraps in for quick daily cleaning of my mess, and then sort these away every week or month or whenever.
It can be a good, useful, and productive thing to save and use lots of scraps, but this will work out MUCH better and be easier to do when the stash is workably organized. Towards that end, I hope this post is helpful!
Have a great day!
Millie
I prefer not to throw anything out that could be put to good use, and I am thankfully blessed with the good sense to be able to imagine a use for any scrap. But having all my many scraps of all different sizes and shapes and contents stuffed into a big "barrel" pop-up hamper was definitely not working for me!
I have worked so hard on getting and keeping my sewing room clean and organized, and this was the last problem to solve. I want to make art quilts to raise money for Alzheimer's (see the link in my sidebar), but I have been avoiding making any scrap projects because the barrel issue made such a mess. First, let me show how it's all better now:
Here is a picture I took the last time I made a scrap project, to show what a ridiculous mess this scrap storage system would make. Before I moved the scraps up to the barrel, I used a smaller version of this messy system, a scrap bag or basket. This has always been a mess and much less than optimally organized!
I love keeping my sewing room clean and organized and I am so glad I finally got this big problem solved!
I searched around on the internet for various scrap management ideas and I stopped to read this post at quiltville, Scrap User's Organization System. When I sew her system, I thought AHA!
So I decided my baby son really didn't need those plastic drawers in his closet, and that I needed them more!
Here's how I sorted my crazy mess of scraps into a workable order:
The top drawer holds red, orange, yellow, purple, and black and brown quilter's cotton scraps. I see now that they are not in that order! I was working quickly to get this done. It took me a full day and a half to do this project, by the way.
I have a lot of blue and green cotton scraps, as these are my favorite colors- so they each got a bin. The pink bin holds both pink scraps, and also pink pieces that are as big as a full yard. The smaller bins hold small scraps of felt and silk. I don't actually keep the bins on top of the drawer unit, but rather stash them neatly beneath my sewing table, which is well within arms length. I can pull them out and put them on top when I need to work with them.
This middle drawer holds "crumbs:" These are little small scraps to be used for string piecing and such. The maximum size for the Alzheimer's Art Quilts is, I think, 10 by 12 inches, so I know I will be able to make something using even the smallest crumbs. These small scraps are confined using a white open bin, so that this drawer can also hold muslin and batting scraps that can be used in making these small quilts or other little scrap projects (such as my favorite scrap project, soft crazy quilted color books for baby)..
This bottom drawer holds scraps from sheets I have already cut, a bag of plaid scraps, and a ziploc with denim and corduroy scraps, as well as some patterned white and light neutral quilter's cottons. So it is kindof a miscellaneous drawer.
I had a lot of scrap knits, but no good bin to fit them; this reusable bag is the perfect size. So for now, the knit scraps are in here, stashed under the sewing table next to the bins.
There is a couple more categories of scraps that I save. One is the "stuffing scraps." I stuff tiny pieces, even thread chains and serger trimmings, and small batting scraps, etc, into a drawstring garbage bag, which I use for stuffing things like pillows and toys. Someone recently gave me an antique wardrobe which I am using as my "sewing room closet," although it doesn't fit in the sewing room and is at the end of our hall instead. That "closet" holds the bag of stuffing scraps, a bag of larger felt scraps, and also some sheets I haven't cut yet, interfacings, and some other things.
I also have two large shoebox bins, one holds apparel fabric scraps for making Barbie doll clothes, and the other has novelty scraps, which I am collecting to make an I-spy/ Alphabet quilt sometime soon.
The last step to make this system workable is one more basket, empty now. This is also stashed under my sewing table and I can use this to store daily scraps in for quick daily cleaning of my mess, and then sort these away every week or month or whenever.
It can be a good, useful, and productive thing to save and use lots of scraps, but this will work out MUCH better and be easier to do when the stash is workably organized. Towards that end, I hope this post is helpful!
Have a great day!
Millie
Labels:
scrap projects,
sewing,
sewing space organization,
tutorials
Sunday, May 8, 2011
Grandmother's Quilts
For Mother's Day, today, I gave my mother and Mr. Green's mother baby quilts that I made from blocks left by their mamas. Both of these dear grandmothers left a small stack of pieced blocks, and last year they were given to me. So I arranged and sewed together the blocks, and because in both cases there were less than enough blocks for a whole quilt, I added borders.
My husband's grandmother hand sewed the blocks in the quilt pictured above. I used the machine to sew them together and quilt it. I just love the pink, blue, and red color scheme, which is one I never would have thought to use. I didn't have enough of one binding for the whole quilt, and so I improvised using two blues!
The blue striped border continues around all four sides on this quilt. The blocks in the middle of this one were made by my great great grandmother, who was also my mama's "mother," through adoption. She passed away many years ago. When my mother gave me her quilting things recently and I saw these blocks, memories came flooding back. The fabric and color choices in this quilt could have only been chosen by her! I can remember seeing her hanging out laundry wearing a dress made from one of these fabrics.
I keep calling these grandmother quilts because they were started by grandmothers and I gave them to grandmothers, for holding new grandchildren. I made a bit of a mess in the quilting of these, as I always do- I love making patchwork, but not quilting as much. They turned out just fine, though, really. Both our mothers seemed pleased, and I feel pleased as punch to have finished these projects which were started by others so many years ago.
I hope all of you who are mothers have had an amazing mother's day this year!
My husband's grandmother hand sewed the blocks in the quilt pictured above. I used the machine to sew them together and quilt it. I just love the pink, blue, and red color scheme, which is one I never would have thought to use. I didn't have enough of one binding for the whole quilt, and so I improvised using two blues!
The blue striped border continues around all four sides on this quilt. The blocks in the middle of this one were made by my great great grandmother, who was also my mama's "mother," through adoption. She passed away many years ago. When my mother gave me her quilting things recently and I saw these blocks, memories came flooding back. The fabric and color choices in this quilt could have only been chosen by her! I can remember seeing her hanging out laundry wearing a dress made from one of these fabrics.
I keep calling these grandmother quilts because they were started by grandmothers and I gave them to grandmothers, for holding new grandchildren. I made a bit of a mess in the quilting of these, as I always do- I love making patchwork, but not quilting as much. They turned out just fine, though, really. Both our mothers seemed pleased, and I feel pleased as punch to have finished these projects which were started by others so many years ago.
I hope all of you who are mothers have had an amazing mother's day this year!
Labels:
baby gifts,
gifts,
patchwork,
sewing
Thursday, March 24, 2011
A Dress for Every Girl Around the World
Dress A Girl Around The World is an organization that I was glad to learn about, and I wanted to make sure that you all know about it, too. The flyer above says "Imagine a world where every little girl owned at least one dress." It is a sad thought that there are little girls who don't own a single dress, and this is something that we CAN do something about! I am so happy to make pillowcase dresses to send to this organization, and I bet you all would like to do the same.
Pillowcase dresses are SUPER EASY to sew, as I have recently discovered. You don't have to start with a pillowcase, but if you do they make up in about ten minutes. You can make them in the traditional way, using bias strips under the arms and casings at the top:
Or you can use elastic across the top, and put casings under the arms, instead:
This didn't work that well for me, and I will never try to put casings under the arms again! It would be better to use bias here, too; here are easy instructions at Rostitchery for a "safer pillowcase dress."
I will make the next ones this way, for sure.
As I said, you don't have to start with a pillowcase; you could start with a yard (or a bit less) of fabric, or even make one from a skirt:
So, I am sending these off to Dress a Girl Around the World now (after I clip those threads), but I plan to make more and better dresses soon, and send more again later. I hope some of you will sew some pretty dresses to send for other little girls, too. Please and thank you.
Happy Sewing!
Labels:
clothing: girls,
easy things to make,
gifts,
gifts for kids,
sewing
Saturday, March 5, 2011
What's In Style for Spring/ Summer 2011: Women's Fashion Top Trends
Are you inspired to sew your wardrobe? I sure am, and many of the trends this Spring are great and easy styles for sewing yourself. So what are the top trends for the season? To find out, read my new article at Yahoo! Contributor Network, What's In Style for Spring 2011: Women's Fashion. I appreciate you reading my work at Y!CN.
I am doing a lot of Spring wardrobe sewing myself, and I hope to show you a lot of the pieces. The top trend this Spring is the jumpsuit, and I am definitely making a few for myself. I started with McCall's Pattern 6083
.
This pattern includes 2 different bodice styles and three lengths of pants. I have learned to make a test garment first, and so I made a sunsuit, using the shorts length and the bandeau style bodice. My Dolly can't wear pants, and so I have no model to show you, and I cannot photograph myself. I took a picture of my short jumpsuit hanging on a hanger, and then laid out on my table, and these photos don't look good! So I am going to have think about how to show off my jumpsuits; maybe I will get brave and model them myself, if Mr. Green will shoot the pictures.
Anyway, the short suit is cute and comfortable (and very easy to sew), and I will wear it in my backyard, not out and about. I also will not make another with the same bodice, as I don't love it for me. I do really like the fit of the shorts. They have nice front pockets and are very comfortable with a great fit. I have just cut out another pair in the capri length, in black. I am going to try the other bodice style with this, and make the top in white. I will let you know how that bodice works out, for sure.
I am excited about making a different jumpsuit today, though. The most recent issue of SewStylish magazine has instructions for combining the bodice and pants from Simplicity 2227 to make an "ultra-elegant jumpsuit." I will be making mine with some flowing chambray colored cotton. Once I do that, I want to work with the pattern I used for this nightgown to make a version in gauze, inspired by Ferragamo's lovely jumpsuit for this season.
That Sew Stylish magazine had another great project, a knit wrap dress, which I made yesterday. I still have to finish the belt ends....I have hesitated on this step, because I am thinking I might like mine to tie, instead of using a vintage wooden buckle as I had planned. Once I decide and finish this dress, I will show you that as well. Amazon does not appear to have the latest issue of this magazine, but I found mine at the fabric store; if you see it in line, you ought to pick it up. I think there were about 6 different garment sewing patterns that I will definitely try, and there are many more than that in the whole issue. This is not a sponsored post, by the way, and there has never been a sponsored post here at Sewing and Growing, just so you know. I recommend things because I like them and think you will too.
If you didn't click the link above, please click now to read my article What's In Style for Spring, please and thank you! Happy Sewing!
P.S. I am adding this photo, because it felt like cheating to have nothing to show in this post! Plus, as I said, I will wear this only in the privacy of my back yard, as it is short and skimpy...so I certainly will never be photographed wearing this! It's cute though and I hope I will enjoy wearing it for gardening this summer, sorry the photo doesn't look good! I left off the belt in the photo because it wouldn't hang right, it is the same as the neck ties, but wider.
I am doing a lot of Spring wardrobe sewing myself, and I hope to show you a lot of the pieces. The top trend this Spring is the jumpsuit, and I am definitely making a few for myself. I started with McCall's Pattern 6083
This pattern includes 2 different bodice styles and three lengths of pants. I have learned to make a test garment first, and so I made a sunsuit, using the shorts length and the bandeau style bodice. My Dolly can't wear pants, and so I have no model to show you, and I cannot photograph myself. I took a picture of my short jumpsuit hanging on a hanger, and then laid out on my table, and these photos don't look good! So I am going to have think about how to show off my jumpsuits; maybe I will get brave and model them myself, if Mr. Green will shoot the pictures.
Anyway, the short suit is cute and comfortable (and very easy to sew), and I will wear it in my backyard, not out and about. I also will not make another with the same bodice, as I don't love it for me. I do really like the fit of the shorts. They have nice front pockets and are very comfortable with a great fit. I have just cut out another pair in the capri length, in black. I am going to try the other bodice style with this, and make the top in white. I will let you know how that bodice works out, for sure.
I am excited about making a different jumpsuit today, though. The most recent issue of SewStylish magazine has instructions for combining the bodice and pants from Simplicity 2227 to make an "ultra-elegant jumpsuit." I will be making mine with some flowing chambray colored cotton. Once I do that, I want to work with the pattern I used for this nightgown to make a version in gauze, inspired by Ferragamo's lovely jumpsuit for this season.
That Sew Stylish magazine had another great project, a knit wrap dress, which I made yesterday. I still have to finish the belt ends....I have hesitated on this step, because I am thinking I might like mine to tie, instead of using a vintage wooden buckle as I had planned. Once I decide and finish this dress, I will show you that as well. Amazon does not appear to have the latest issue of this magazine, but I found mine at the fabric store; if you see it in line, you ought to pick it up. I think there were about 6 different garment sewing patterns that I will definitely try, and there are many more than that in the whole issue. This is not a sponsored post, by the way, and there has never been a sponsored post here at Sewing and Growing, just so you know. I recommend things because I like them and think you will too.
If you didn't click the link above, please click now to read my article What's In Style for Spring, please and thank you! Happy Sewing!
P.S. I am adding this photo, because it felt like cheating to have nothing to show in this post! Plus, as I said, I will wear this only in the privacy of my back yard, as it is short and skimpy...so I certainly will never be photographed wearing this! It's cute though and I hope I will enjoy wearing it for gardening this summer, sorry the photo doesn't look good! I left off the belt in the photo because it wouldn't hang right, it is the same as the neck ties, but wider.
Labels:
clothing: women's wear,
sewing
Saturday, February 26, 2011
Spring Wardrobe Sewing: More Wrap Skirts and a T Refashion
Our weather is already starting to warm up. So I put away the corduroy and fleece yardage that I haven't sewn yet; I will save those projects for later in the year. Right now, I am sewing for Spring and Summer.
I already posted about the awesome and easy wrap skirt pattern in Chic and Simple Sewing
. But I am just loving this skirt so much that I made more. I made a slight modification to the pattern on these, which are now better than the first three that I already showed here. Instead of sewing the sides and then hemming the bottom, I rounded the bottom edges of the skirt and used the serger to hem the whole thing at once. This works out better in the way that the skirt hangs, in my opinion.
First I made this one:
That T-shirt was much too big for me, but too small for Mr. Green, so I resized it and added elastic casings to the sleeves and the neck. I guess this is really the first tee I have refashioned for me; I will wear it but the next tee I recon will be nicer than this turned out! Dolly doesn't do the skirt justice, though; the length is exactly right and I love the colors...it really does look better on me than on her, I guess because my legs are so much nicer than hers! lol
Here is another:
This skirt matches most every tee in my closet, including this blue one, which is one of my favorites. I only had 2 yards of this patchworked shirting, and so I made the tie with a brown grosgrain ribbon. I wear a close fitting muslin bias skirt under this.
I made one more wrap skirt, in a color (yellow gold) that I have never worn, but which says Summer happily...I will show that one later, when I have finished the top I am making up to go with it.
I know I said it before, but wrap skirts are super simple and easy to sew, and fun to wear, too. I am excited to make some of the other dresses in Chic and Simple Sewing for Spring, too; I hope to show those off soon, lol.
What have you been working on sewing for Spring?
I already posted about the awesome and easy wrap skirt pattern in Chic and Simple Sewing
First I made this one:
That T-shirt was much too big for me, but too small for Mr. Green, so I resized it and added elastic casings to the sleeves and the neck. I guess this is really the first tee I have refashioned for me; I will wear it but the next tee I recon will be nicer than this turned out! Dolly doesn't do the skirt justice, though; the length is exactly right and I love the colors...it really does look better on me than on her, I guess because my legs are so much nicer than hers! lol
Here is another:
This skirt matches most every tee in my closet, including this blue one, which is one of my favorites. I only had 2 yards of this patchworked shirting, and so I made the tie with a brown grosgrain ribbon. I wear a close fitting muslin bias skirt under this.
I made one more wrap skirt, in a color (yellow gold) that I have never worn, but which says Summer happily...I will show that one later, when I have finished the top I am making up to go with it.
I know I said it before, but wrap skirts are super simple and easy to sew, and fun to wear, too. I am excited to make some of the other dresses in Chic and Simple Sewing for Spring, too; I hope to show those off soon, lol.
What have you been working on sewing for Spring?
Labels:
clothing: women's wear,
easy things to make,
serger,
sewing
Wednesday, February 16, 2011
Sew Easy Wrap Skirts for Your Wardrobe
If you haven't gotten Christine Hayne's book, Chic and Simple Sewing
yet, here is another great reason to get this book. A wrap skirt must be the absolute simplest kind of skirt to sew (if you have a good pattern), and I am loving this one.
I made 2 of these skirts, from start to finish, before noon today.
This one was from the same vintage sheet I already used to make short jammies, a ruffled cafe curtain for my back door, and some heirloom seed packets and a covered canister, too!
I also finished up the first wrap skirt I started a long time ago.
This one is a little bit shorter; I messed up the hem when I tried to turn and sew it on the sewing machine, and so I had to trim it. It is really a WHOLE LOT easier to use your serger to make rolled hems!
Last year I made lots of short bias skirts for the summer, but this year I think this wrap style will be my go to skirt pattern. It uses 2 1/2 yards of fabric (as opposed to one yard, for the bias skirt), so this is a more ample and fuller skirt. I am loving this skirt pattern so much for the nice swish-y effect!
There is not so much as even an elastic casing in this skirt, just straight, simple sewing- so this would be an awesome very first pattern for a new seamstress to sew.
I don't have any other yardage I can use for making more of these now, and I am restraining myself from going online fabric shopping. But I know for sure I will be making a lot more of these wrap skirts. This is such a classic, and yes, chic, style of skirt, that I know I will be able to wear them year after year.
There are a lot more awesome patterns besides this wrap skirt in Chic and Simple Sewing
. Here you can see my little black dress, and here is another variation of that shift dress pattern, with sweet little sleeves. I also made the jacket, and soon want to try out the opera and baby doll dress patterns. You really should get this book now if you haven't!
I really appreciate you making all your amazon orders through links to Amazon on my site! Happy Sewing!
I made 2 of these skirts, from start to finish, before noon today.
This one was from the same vintage sheet I already used to make short jammies, a ruffled cafe curtain for my back door, and some heirloom seed packets and a covered canister, too!
I also finished up the first wrap skirt I started a long time ago.
This one is a little bit shorter; I messed up the hem when I tried to turn and sew it on the sewing machine, and so I had to trim it. It is really a WHOLE LOT easier to use your serger to make rolled hems!
Last year I made lots of short bias skirts for the summer, but this year I think this wrap style will be my go to skirt pattern. It uses 2 1/2 yards of fabric (as opposed to one yard, for the bias skirt), so this is a more ample and fuller skirt. I am loving this skirt pattern so much for the nice swish-y effect!
There is not so much as even an elastic casing in this skirt, just straight, simple sewing- so this would be an awesome very first pattern for a new seamstress to sew.
I don't have any other yardage I can use for making more of these now, and I am restraining myself from going online fabric shopping. But I know for sure I will be making a lot more of these wrap skirts. This is such a classic, and yes, chic, style of skirt, that I know I will be able to wear them year after year.
There are a lot more awesome patterns besides this wrap skirt in Chic and Simple Sewing
I really appreciate you making all your amazon orders through links to Amazon on my site! Happy Sewing!
Tuesday, February 8, 2011
Easy Quilting Project: Make a Wall Pocket from One Block
I have been working hard on rearranging my sewing room and making a lot of improvements. I keep sitting down to make a post, looking at my photos, and thinking of another improvement to implement. I have a lot of new ideas to show you soon. For now, here is one little project I whipped up for my sewing room. I used a UFO block that was never going to be a quilt. I had planned to make a throw pillow cover from this block, but have since decided that we have more than enough throw pillows around here!
I always have a lot of garment pattern pieces tacked on my bulletin board, and this leaves no room for the other stuff I want to tack up. So I used this orphan quilt block and made a big wall pocket for holding whatever garment pattern pieces I am working with. I wrote a tutorial, too; here is the link to this easy quilting project. Please stop by and read my tutorial at AC!
Happy Sewing!
I always have a lot of garment pattern pieces tacked on my bulletin board, and this leaves no room for the other stuff I want to tack up. So I used this orphan quilt block and made a big wall pocket for holding whatever garment pattern pieces I am working with. I wrote a tutorial, too; here is the link to this easy quilting project. Please stop by and read my tutorial at AC!
Happy Sewing!
Sunday, January 30, 2011
Easy Sew Ladies Pillowcase Nightgown from a Vintage Sheet
If you are looking for a nightgown actually made from pillowcases, click here for my tutorial for an easy nightgown made from a pair of pillowcases.
This ladies nightgown in this post reminds me of the little girl's style of pillowcase dresses.
When my parents recently moved out of my childhood home, my mom gave me a big box full of sheets. I love upcycling, and sweet girly sheets are perfect for making nightgowns, in my opinion. I made this from Simplicity 9505, and I just love it.
The nightgown pictured above is version E. I also made another nightgown in version C, with elasticized short sleeves, but I don't like that nightgown nearly as much as this one. The main reason is because of the fabric I chose. I got some bargain cotton fabric on a mini bolt on black friday from Hancock, and it is too sheer for me to be comfortable in. If I make that version from a sweetly printed sheet, I will probably like it a lot better.
I know I will be making this version (E) pictured here again; I have lots more girly sheets to upcycle and this pattern was super duper easy to make. This is the kind of easy pattern that even a beginner sewist can make without trouble. It says Simplicity 2 hour pattern on the front, but I am certain this took much less than 2 hours to make. Mr. Green has looked at me and said "That's pretty," every night that I have worn this to bed, so like I said, I will make this sweet nightgown probably several more times.
Subscribe to:
Posts (Atom)